
Tutorial: Cabotegravir IM Suspension Injection
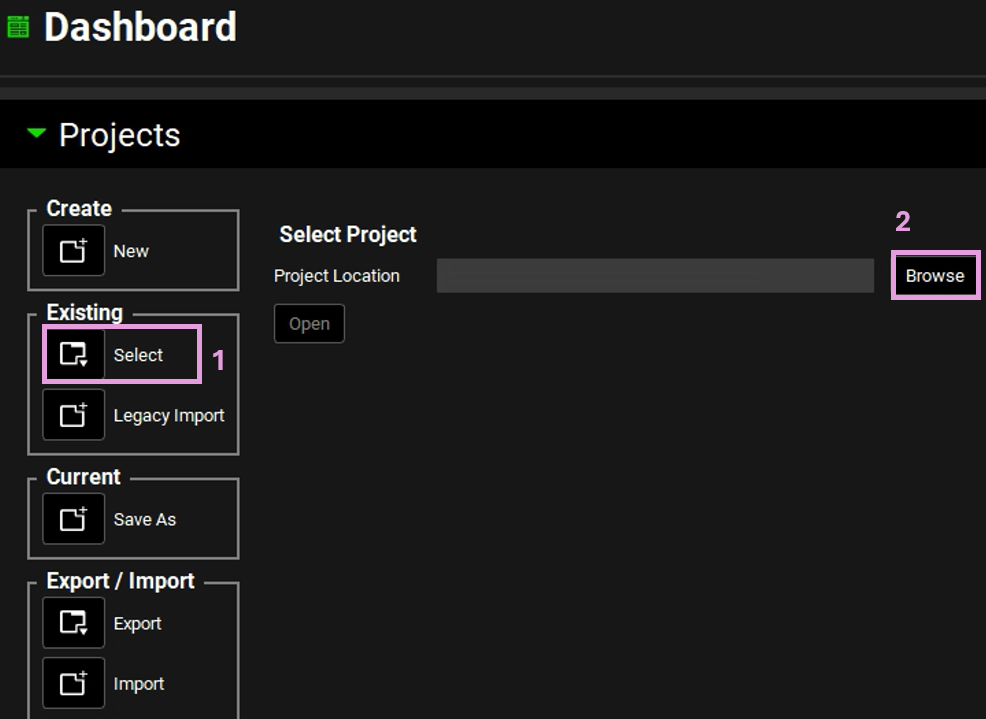
Open GPX™ and, in the Dashboard view, click on the icon next to Select to open an Existing project.
Click Browse, navigate to the C:\Users\<user>\AppData\Local\Simulations Plus, Inc\GastroPlus\10.2\Tutorials\Cabotegravir-IM folder, and select the project file cabotegravir.gpproject by clicking on it and clicking Open.
Click the icon next to Save As, enter “Cabotegravir IM Complete” as the Project Name, and use Browse to select or create a folder where the project must be stored. Click Yes on the information window that appears which will also clear the message from the Messages Center indicating that the project has been successfully saved. The project name displayed in the top right corner of the interface will update to reflect the newly saved project, confirming that the action was completed successfully.
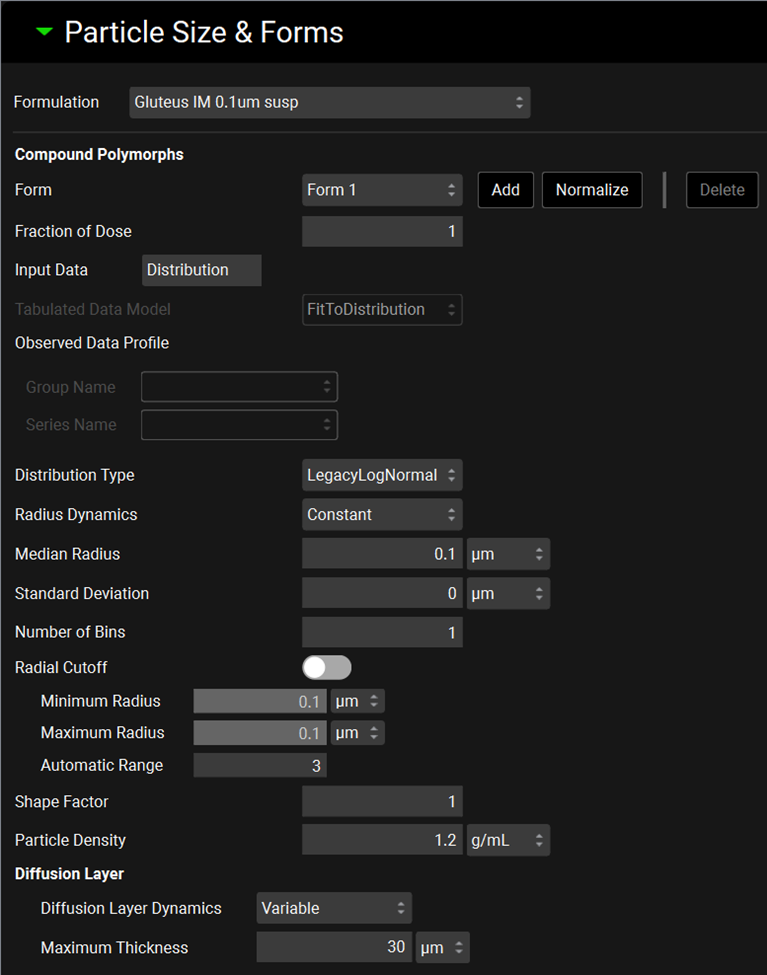
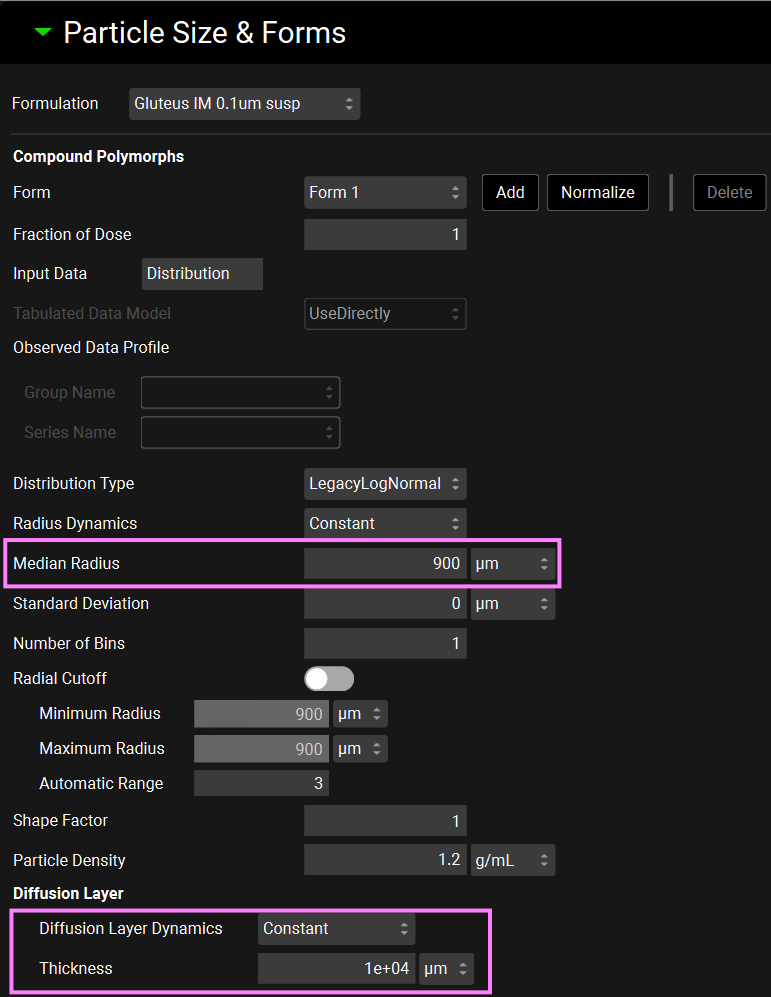
Move through the views on the navigation pane from Observed Data to Simulations, observing the information that has been entered into this project. In the Dosing view, expand the Formulations panel and select the Gluteus IM 0.1um susp formulation. Expand the Particle Size & Forms sub-panel and examine the particle size characteristics, in particular the median radius and the diffusion layer maximum thickness.
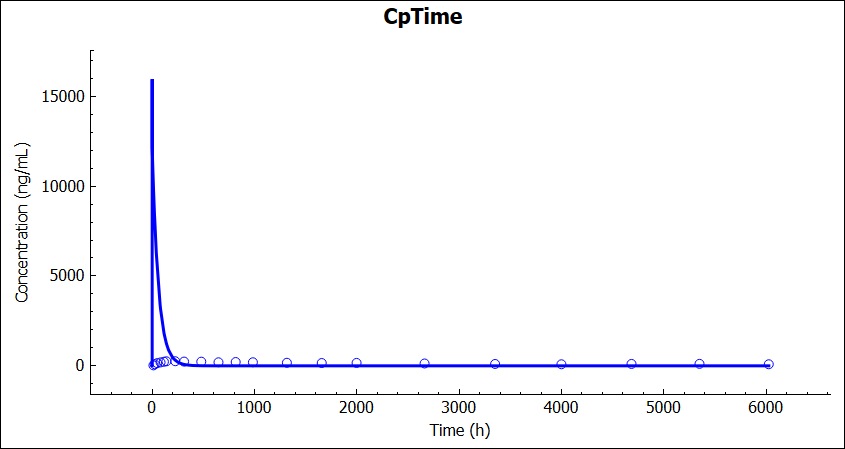
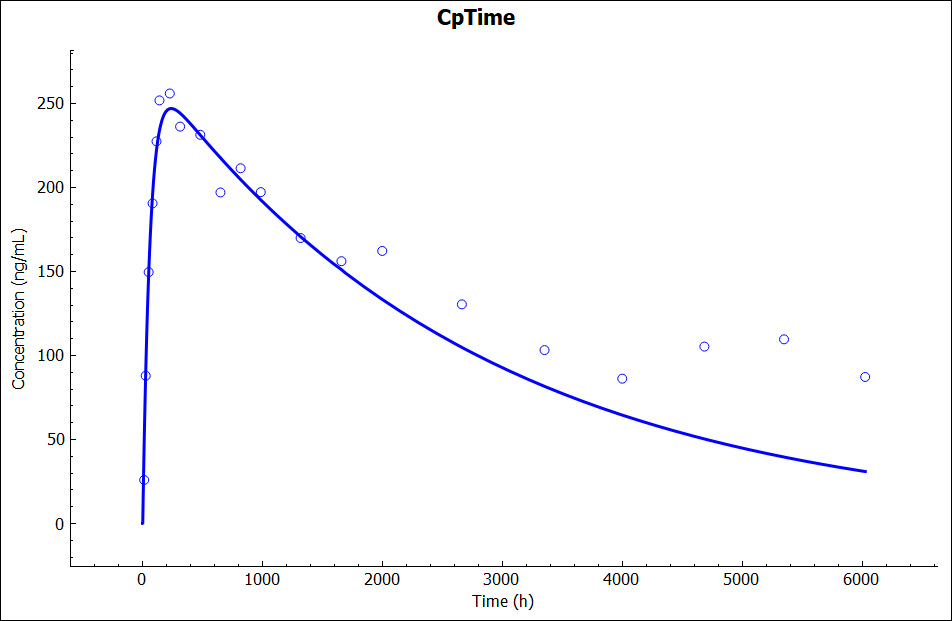
Navigate to the Simulations view and select “100 mg LAI Gluteus IM 0.1um suspension”. Click on Check Warnings and run the simulation to see how well the program is able to match the experimental data.
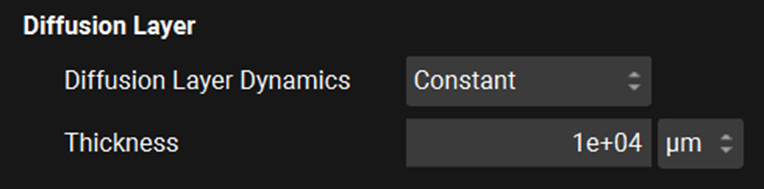
The default diffusion layer thickness is based on the gut, where there is convective flow of gut fluids. This value may be greater at an injection site in the muscle where there is no convective flow. Navigate back to the Dosing view, and select the Gluteus IM 0.1um susp formulation in the Formulation panel if not already selected. Expand the Particle Size & Forms sub-panel and change the Diffusion Layer Dynamics to Constant and increase the diffusion layer thickness to a high value of 10000 um.
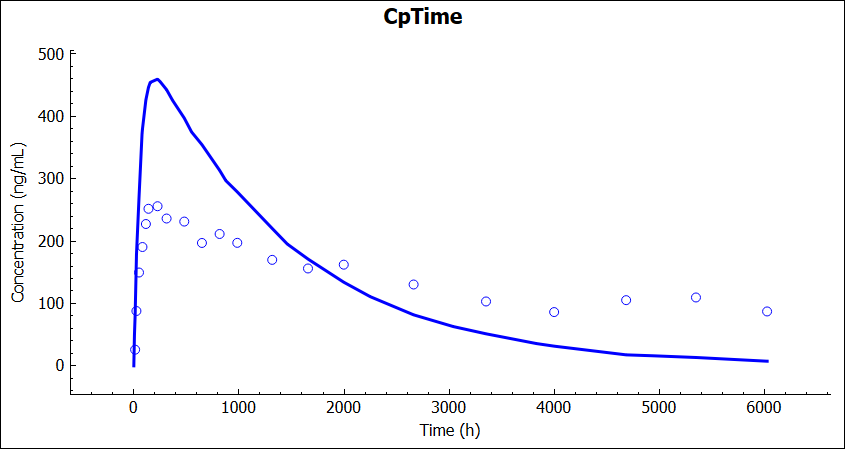
Navigate to the Simulations view and run the 100 mg LAI Gluteus IM 0.1um suspension simulation again to see the effect.

Depending on formulation characteristics, there may be agglomeration of particles at the injection site, leading to a higher median radius in situ. Return to the Dosing view and select the Gluteus IM 0.1um susp formulation in the Formulation panel if not already selected. Expand the Particle Size & Forms sub-panel, change the Diffusion Layer Thickness back to 30 um, and increase the median particle radius to 1500 um.
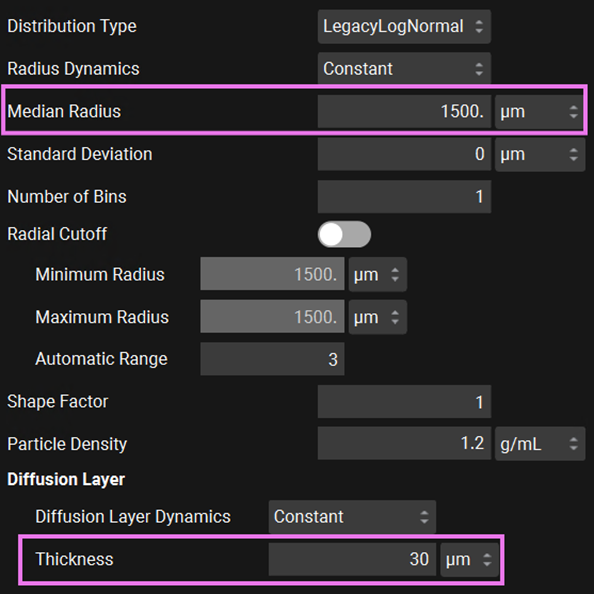
Navigate to the Simulations view and run the 100 mg LAI Gluteus IM 0.1um suspension simulation again to see the effect.
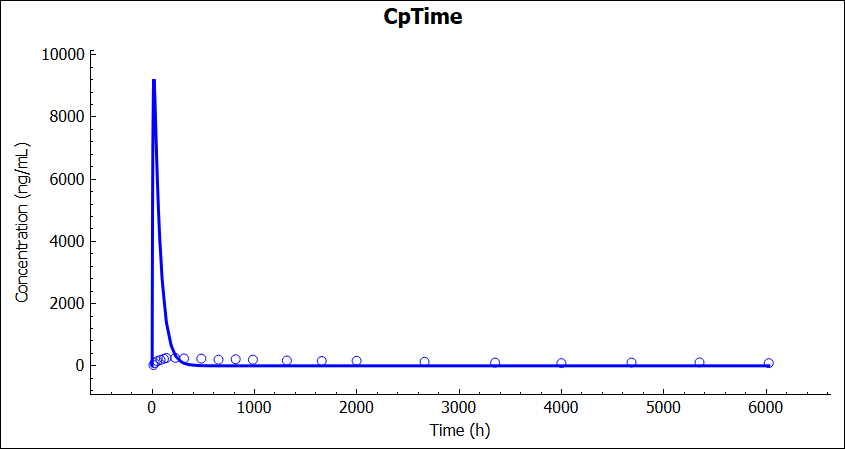
Neither of these potential effects can explain the experimental data separately. However, they may be acting together to produce the observed profile. This possibility can be explored further using Parameter Sensitivity Analysis.
Navigate back to the Dosing view, under Formulations panel, select Gluteus IM 0.1um susp formulation if not already selected and under the Particle Size & Forms sub-panel, set the median radius back to 0.1um.
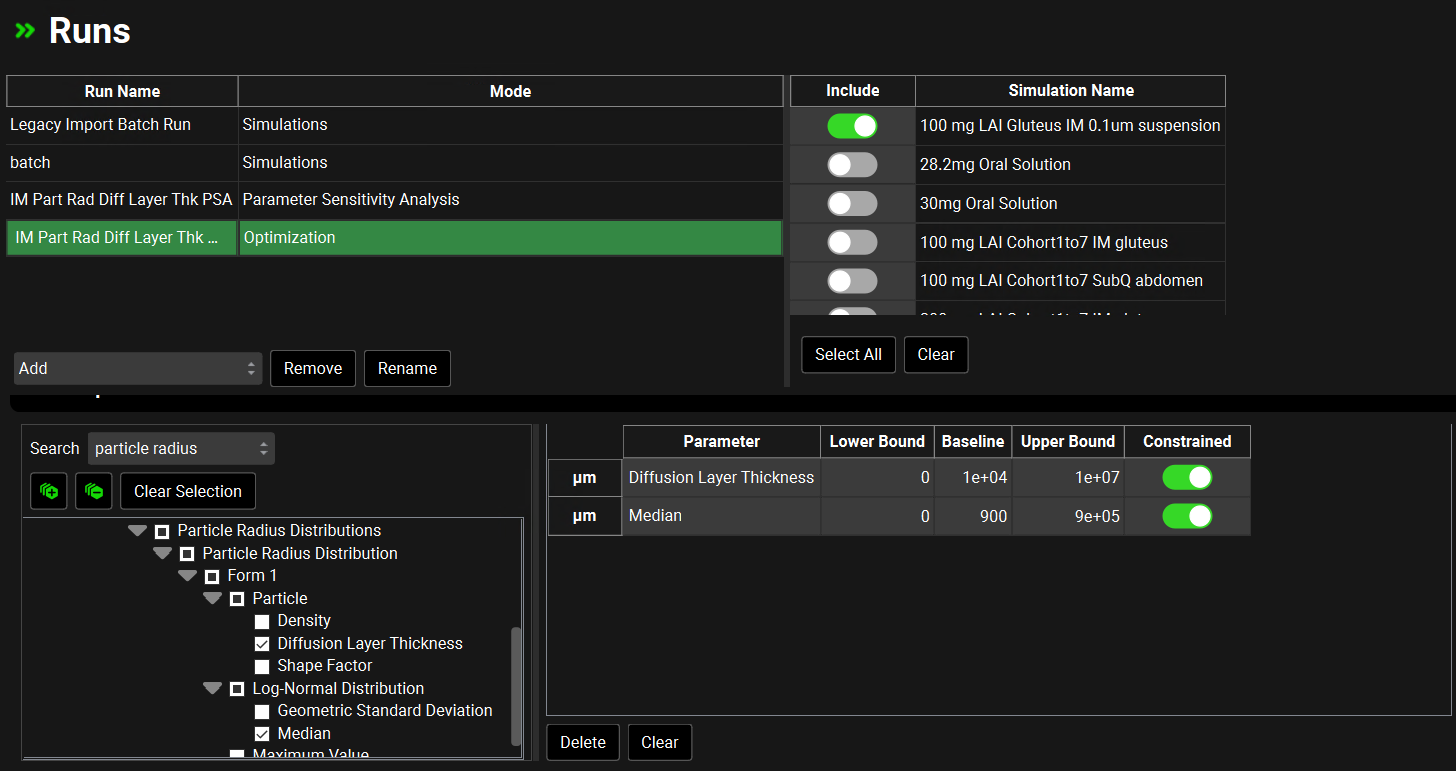
Navigate to the Runs view, click on the drop-down to Add a Parameter Sensitivity Analysis run. The Enter Run name: dialog box will pop up. Name the run IM Part Rad Diff Layer Thk PSA. Click on the Include toggle next to the 100 mg LAI Gluteus IM 0.1um suspension simulation.
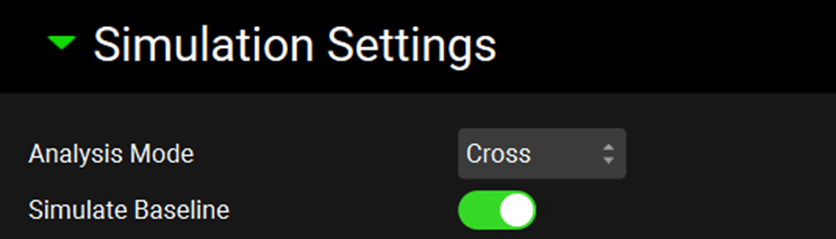
Set the Analysis Mode to Cross.
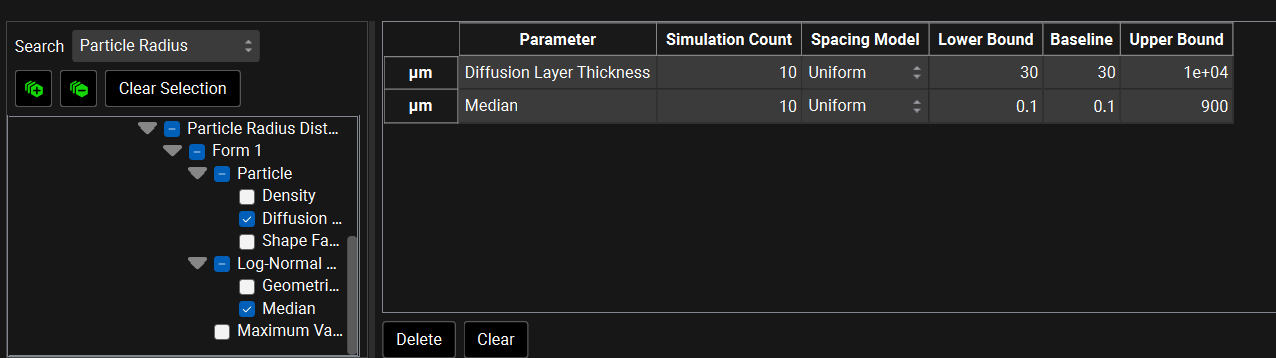
Scroll down to the parameters table and type “Particle Radius” into the Search box, then press Enter. Next, scroll down to the Dose Schedule section and select Diffusion Layer Thickness under Particle and Median under Log-Normal Distribution. Set the bounds for the Diffusion Layer thickness to 30 for the lower bound and 10000 for the upper bound. Set the bounds for Median to 0.1 for the lower bound and 900 for the upper bound. Use Uniform spacing for both parameters.
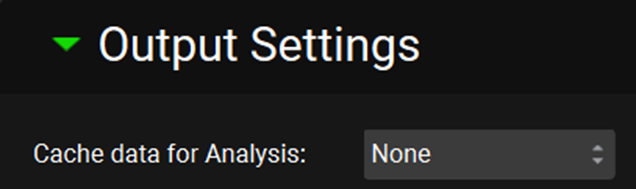
In the Output Settings, select None for Cache data for Analysis, then click Start under the Run Controls panel.
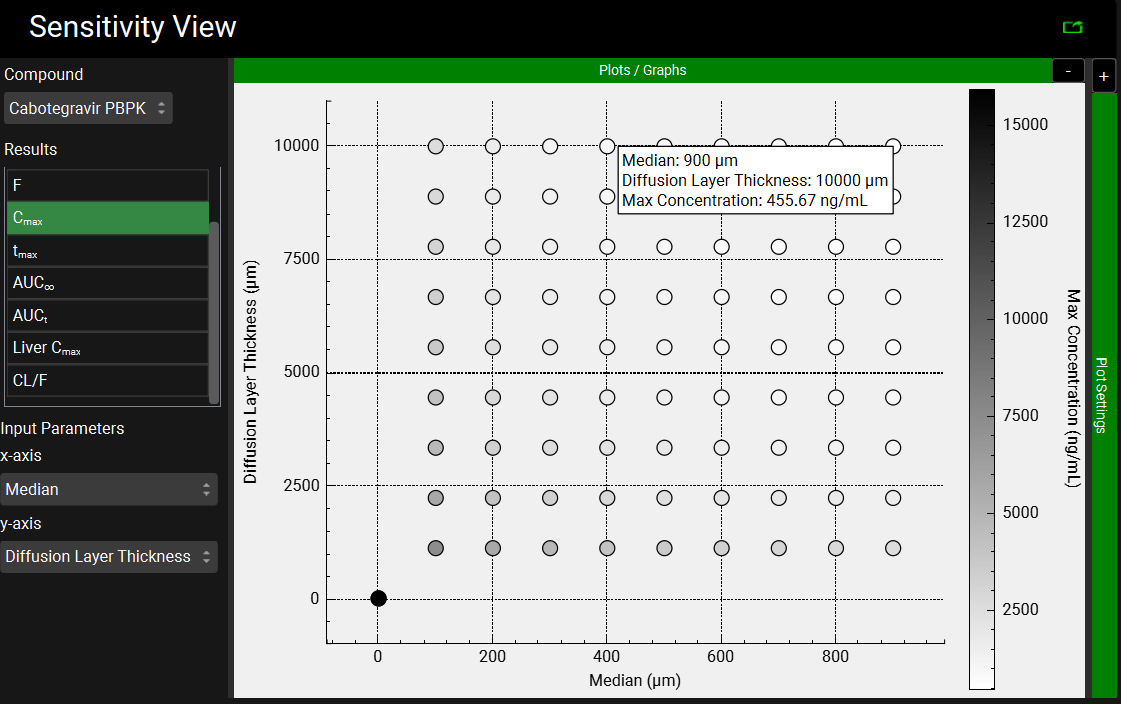
Once the run is complete, the Analysis view will show up automatically. In the Sensitivity View, select Cmax under Results, and set one of the axis to Median and the other to Diffusion Layer Thickness. Hover over some of the points to see where we are closest to the experimental Cmax (0.2518 ug/mL = 251.8 ng/mL).
Navigate back to the Dosing view and update the Gluteus IM 0.1um susp formulation using the diffusion layer thickness and median radius from the best PSA results, in this case Diffusion layer thickness 10000um and Median particle size 900um.
Navigate to the Simulations view and run the 100 mg LAI Gluteus IM 0.1um suspension simulation again to gauge how well it performs.
These values can be used as a starting point for the optimization process. Navigate to the Runs view, click the Add button and select Optimization. The Enter Run name: dialog box will pop up. Name the run IM Part Rad Diff Layer Thk Opt. Click on the Include toggle next to the 100 mg LAI Gluteus IM 0.1um suspension simulation. Scroll down to the parameters table and in the Search box, type Particle Radius and press Enter. Scroll down to the Dose Schedule section and select Diffusion Layer Thickness under Particle and Median under Log-Normal Distribution.
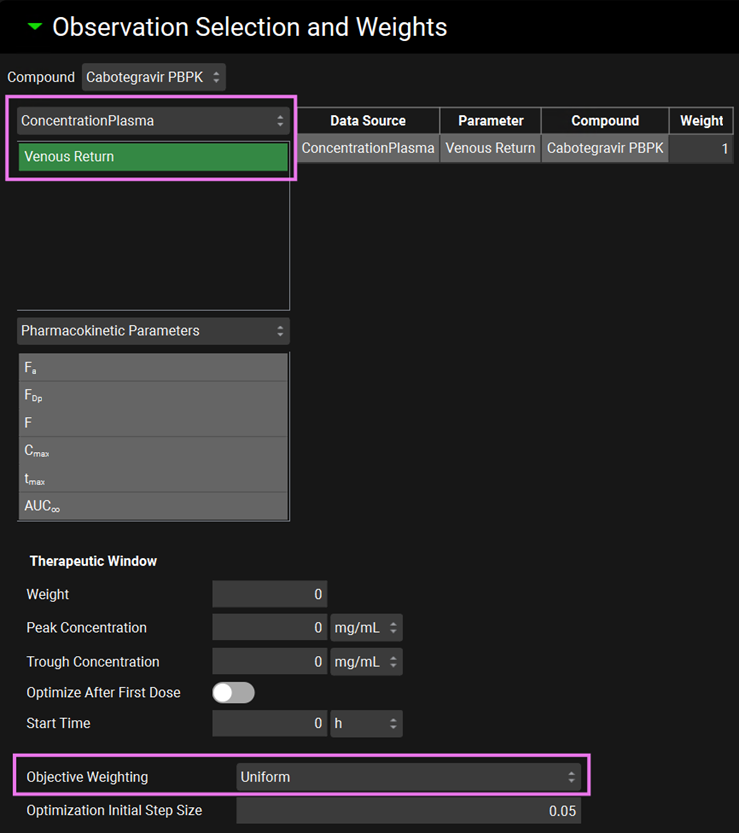
Under the Observation Selection and Weights panel, select Venous Return and set the Objective Function Weighting to Uniform.
In the Output Settings, select None for Cache data for Analysis and click Start under the Run Controls panel.
Once the run is complete, the Analysis view will show up automatically. In the Optimization View the optimization results will be shown.
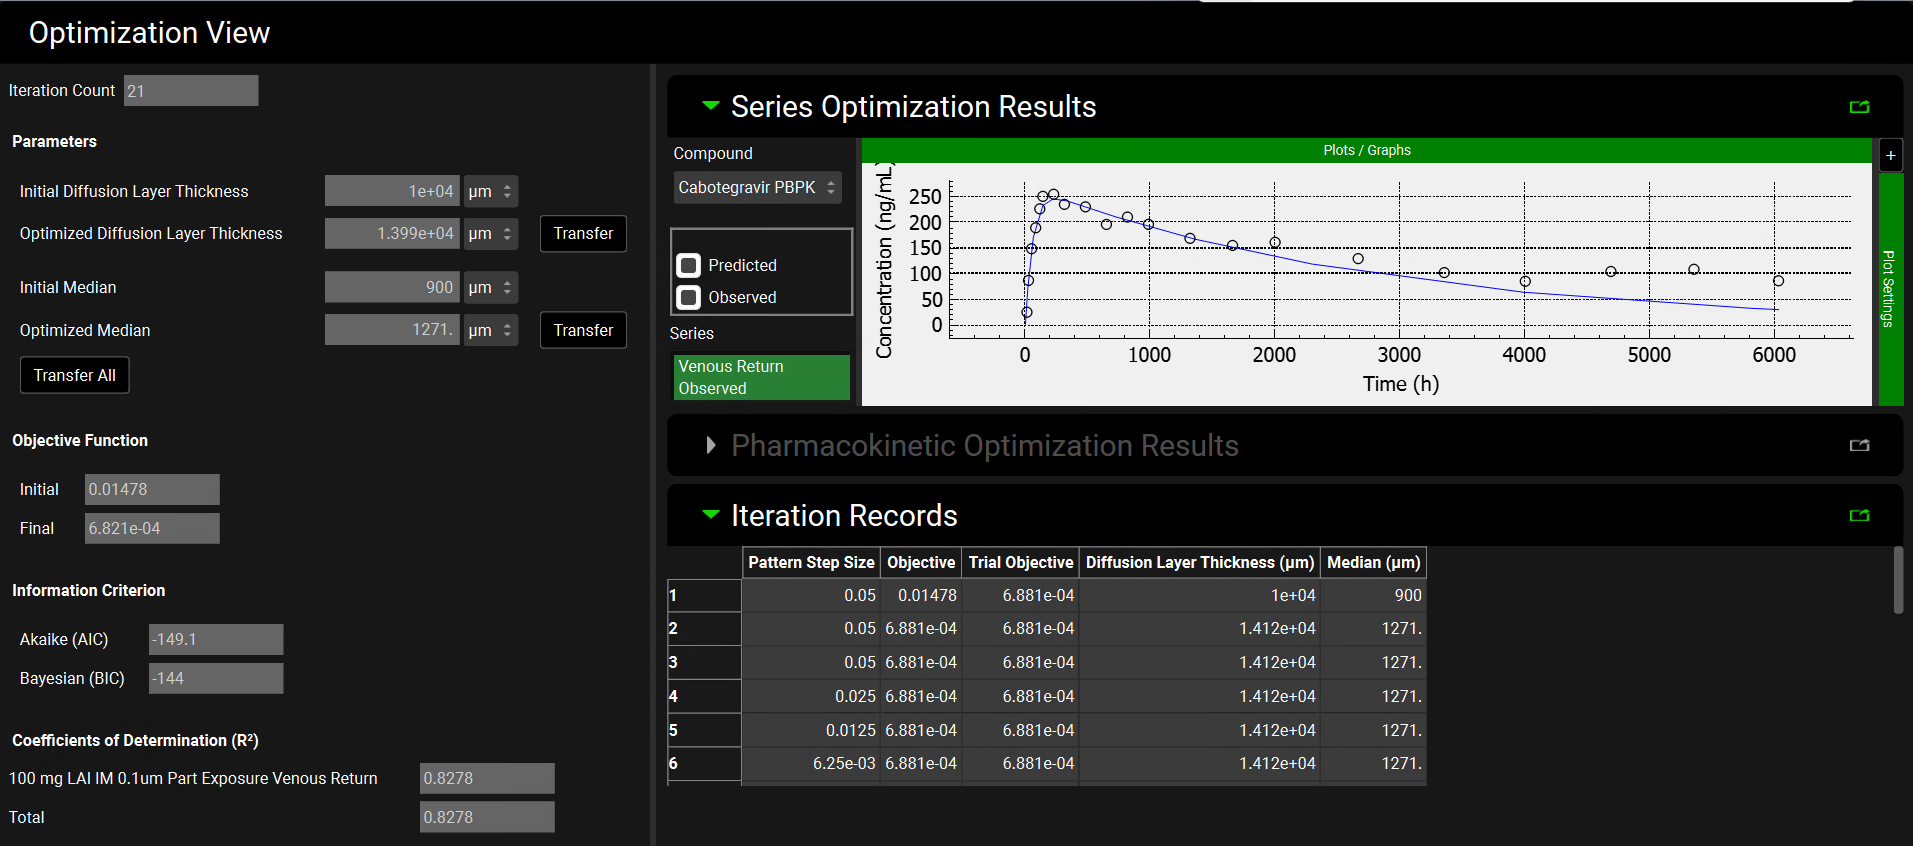
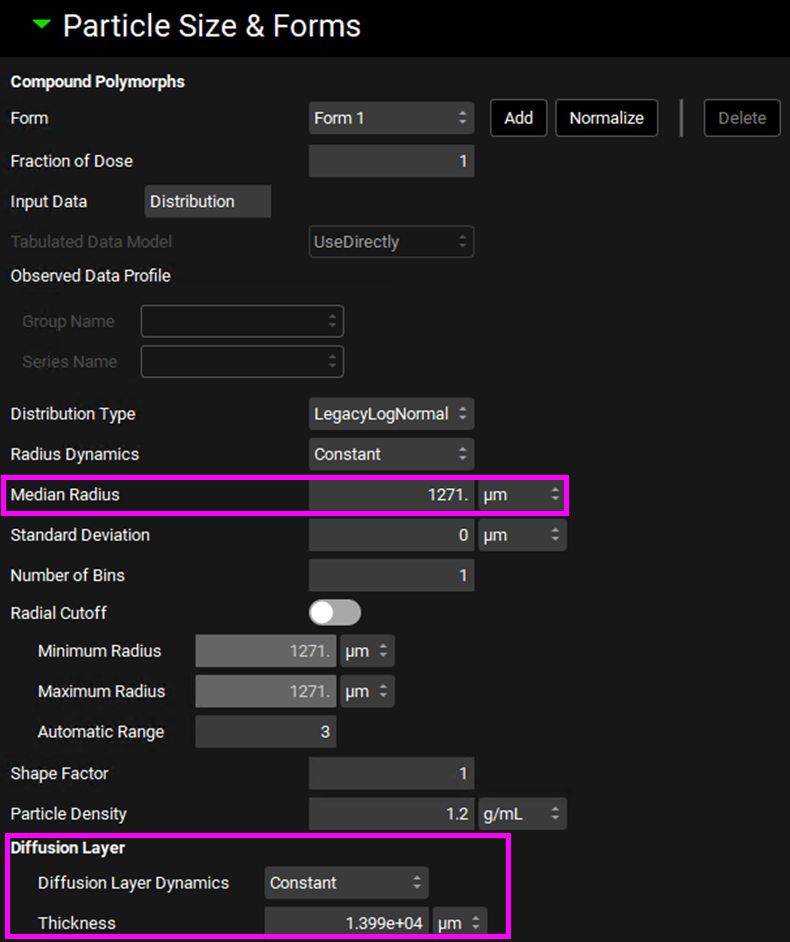
Navigate back to the Dosing view and update the Gluteus IM 0.1um susp formulation using the diffusion layer thickness and median radius from the optimization results, in this case Diffusion layer thickness 13990um and Median particle size 1271um.
Navigate to the Simulations view and run the 100 mg LAI Gluteus IM 0.1um suspension simulation again to notice that the optimized values give a good a prediction.
Results using output frequency every 1 step under Configuration panel in Simulations view.