
Tutorial: Dose Unit Options
In this tutorial, we will cover:
Creating a new GPX™ project and adding a default compound
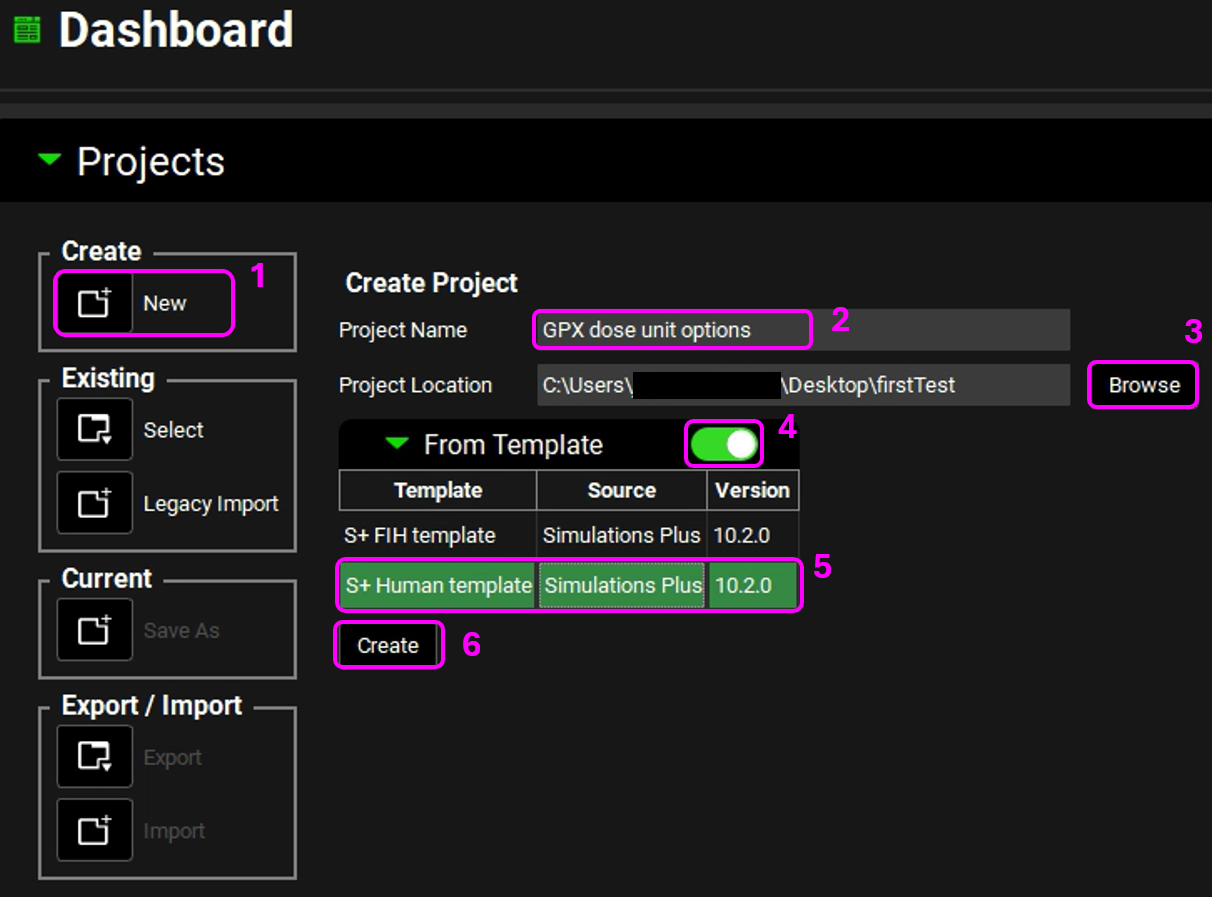
Open GPX™ and, in the Dashboard view, click on the icon next to New to create a new project.
Enter a Project Name, for example “GPX dose unit options”.
Click Browse to select the desired Project Location folder.
Click to turn on the toggle next to From Template.
Click on the template called S+ Human Template to select this to use.
Click Create.
The name of the project should now be visible in the top right corner of the program.
Navigate to the Compounds view.
Click Add and enter the name of the compound – we are going to use the default compound properties for this tutorial and so you can name the compound as “Example Compound”, then click OK.
Save the project.
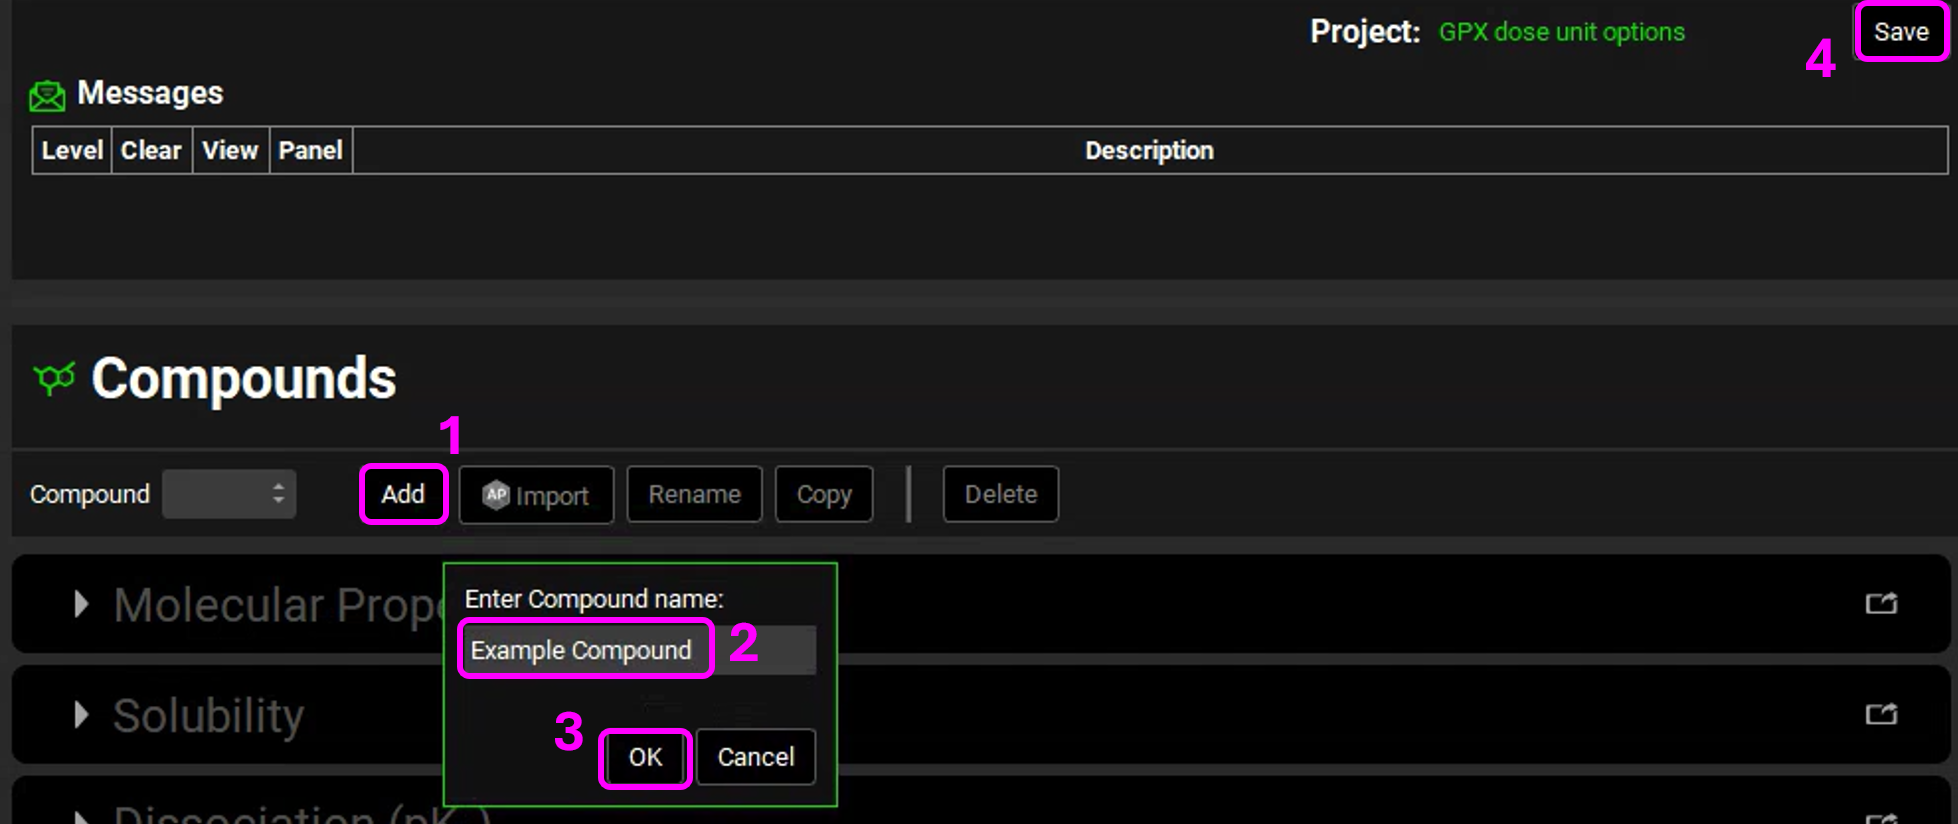
NB – numbers reflect the order of the steps in the screenshot, rather than corresponding to the steps in the tutorial
Adding a Dosing Schedule using different units
Navigate to the Dosing view.
The template comes with an oral tablet formulation already loaded, expand the Formulations panel (by clicking on the green arrow or double clicking on the panel bar) to view “PO Tablet” then collapse the panel again.
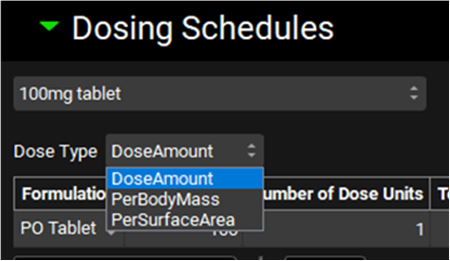
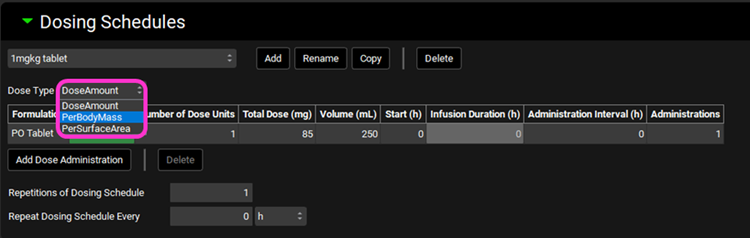
Expand the Dosing Schedules panel and observe the “100mg tablet” dosing schedule that comes with the template. To define the dose in milligrams the Dose Type must be set to DoseAmount.
Click the arrows next to DoseAmount and observe the other options available:
PerBodyMass – allows the dose to be defined as a function of body mass.
Per SurfaceArea - allows the dose to be defined as a function of surface area.
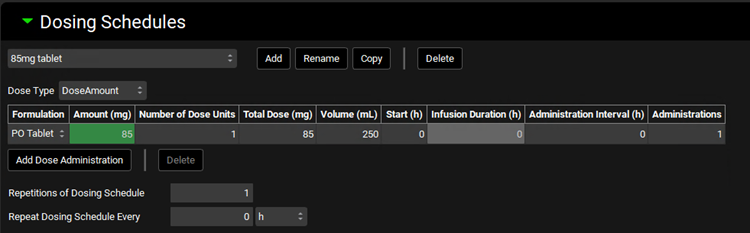
Copy the 100mg tablet Dosing Schedule, type “85mg tablet” in the pop-up box for the Dosing Schedule name and click OK.
Change the Amount to 85 mg and note that the Total Dose automatically updates.
Copy the 85mg tablet Dosing Schedule, type “1mgkg tablet” in the pop-up box for the Dosing Schedule name and click OK.
Click the arrows next to DoseAmount and select the PerBodyMass option.
Leave the Amount Per Body Mass (mg/kg) as 1.
Copy the 1mgkg tablet Dosing Schedule, type “1mgm2 tablet” in the pop-up box for the Dosing Schedule name and click OK.
Select the PerSurfaceArea option for the Dose Type.
Leave the Amount Per Surface Area (mg/m2) as 1.
Save the project.
Creating and running Simulations using the different dosing schedules
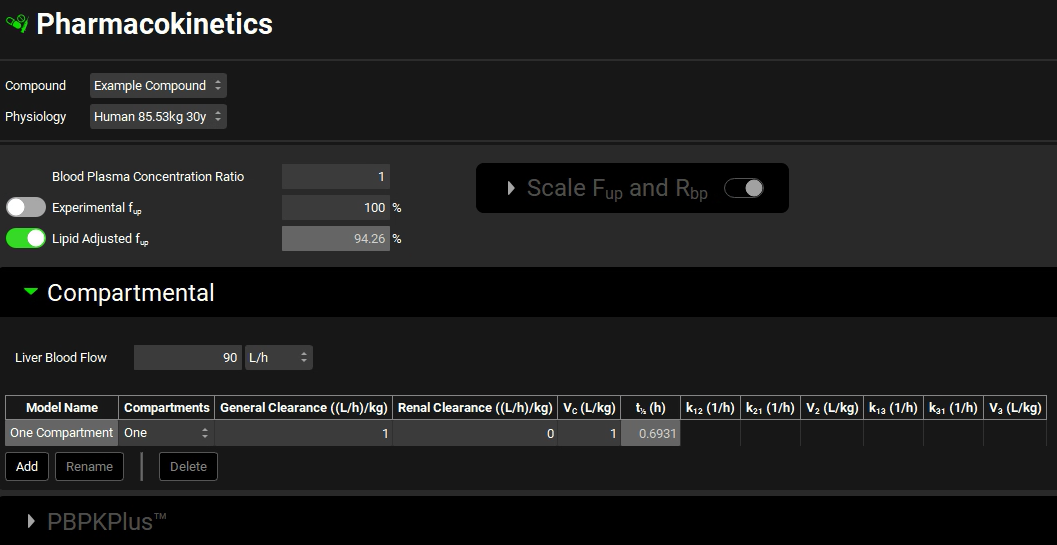
Navigate to the Pharmacokinetics view and expand the Compartmental panel, note the default parameters for Blood Plasma Concentration Ratio, Fup, clearance and volume of distribution.
Navigate to the Simulations view and create a new simulation using the Add button. Enter “85mg tablet” as the Simulation name and click OK.
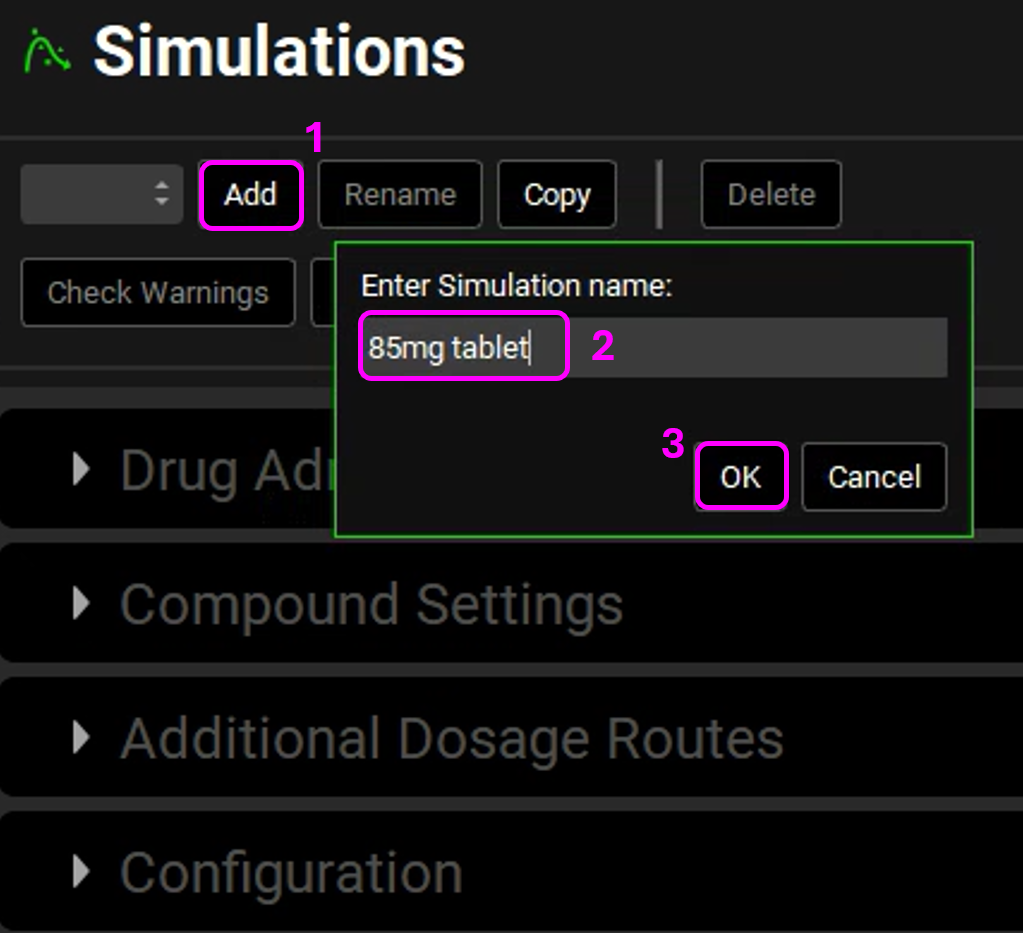
NB – numbers reflect the order of the steps in the screenshot, rather than corresponding to the steps in the tutorial
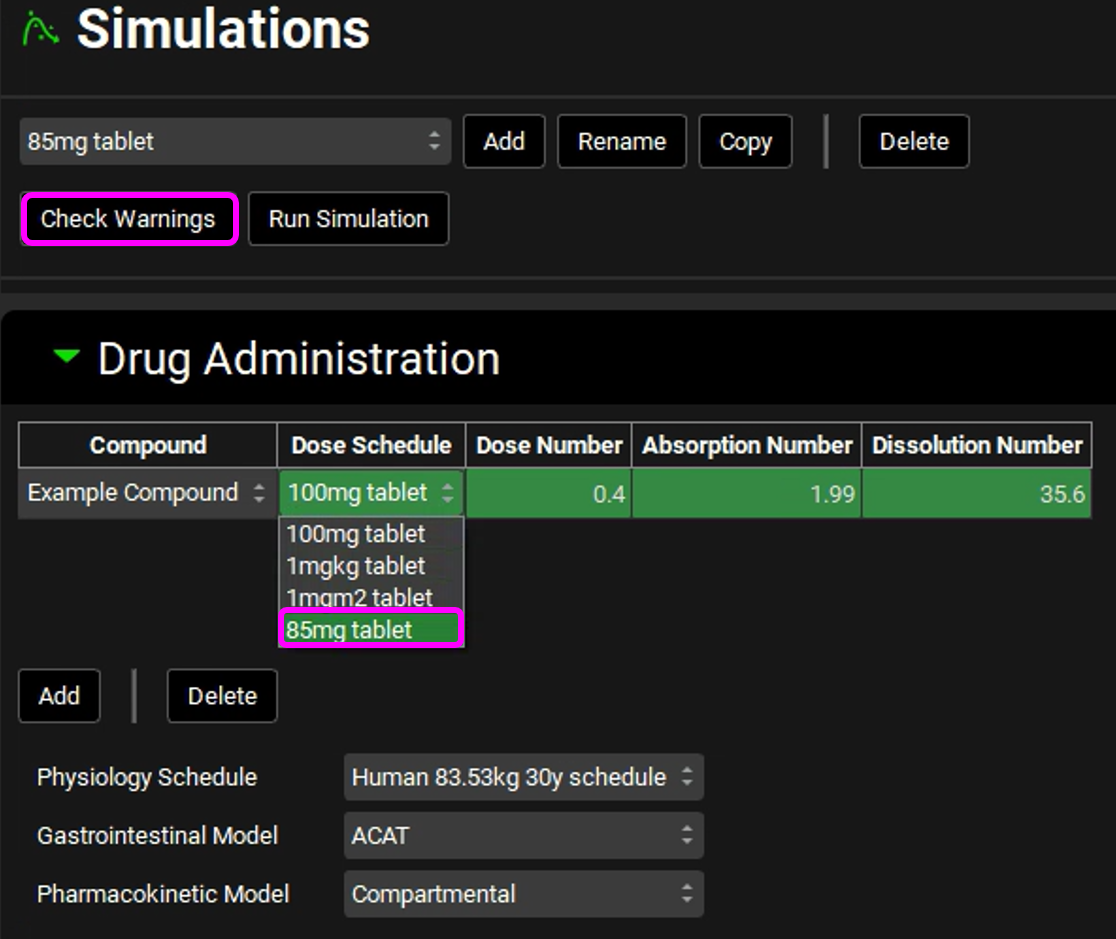
Expand the Drug Administration panel and check that the Example Compound is selected. Click on the arrows next to the 100mg tablet in the Dose Schedule cell and select the 85mg tablet.
Click the Check Warnings button.
Copy the Simulation and name it “1mgkg tablet”, click OK, then select 1mgkg tablet as the Dose Schedule. Then click the Check Warnings button.
Copy the Simulation and name it “1mgm2 tablet”, click OK, then select 1mgm2 tablet as the Dose Schedule. Then click the Check Warnings button.
Save the Project.
Navigate to the Runs view, click Add, select Simulations, enter “Dose unit options” as the Run name and click OK.
Press the Select All button underneath the Simulation Name on the right-hand side of the interface. Save the project.
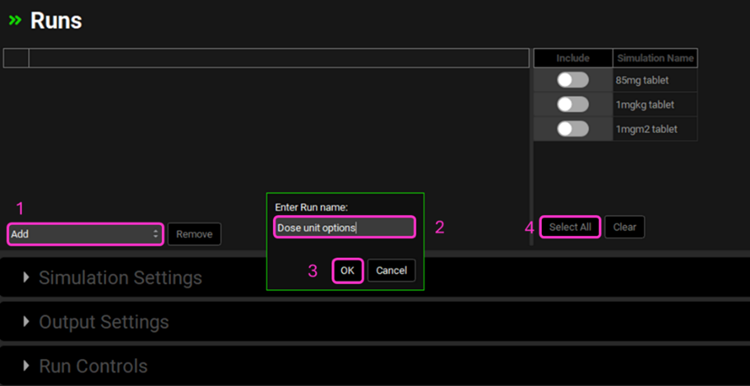
NB – numbers reflect the order of the steps in the screenshot, rather than corresponding to the steps in the tutorial.
Minimize the Output Settings panel and press Start in the Run Controls panel.
When the Run has completed, the program switches automatically to the Analysis view. Switch the mode to Summary View and click the Observed data on toggle to change this to off and remove the empty observed data columns from the summary table.
Note that the Cmax and AUC for the 85 mg tablet are slightly lower than those for the 1 mg/kg tablet due to the bodyweight of the subject in the simulation being 85.53 kg which results in the 1 mg/kg dose being slightly higher than 85 mg. The Cmax and AUC for the 1mg/m2 dose are significantly lower than the other two due to the dose by body surface area being only 2 mg.
