
Tutorial: GPX™ Quick Start
In this tutorial, we will cover:
Creating a GPX™ project to use as a template
Open GPX™. The Dashboard view is the open view.
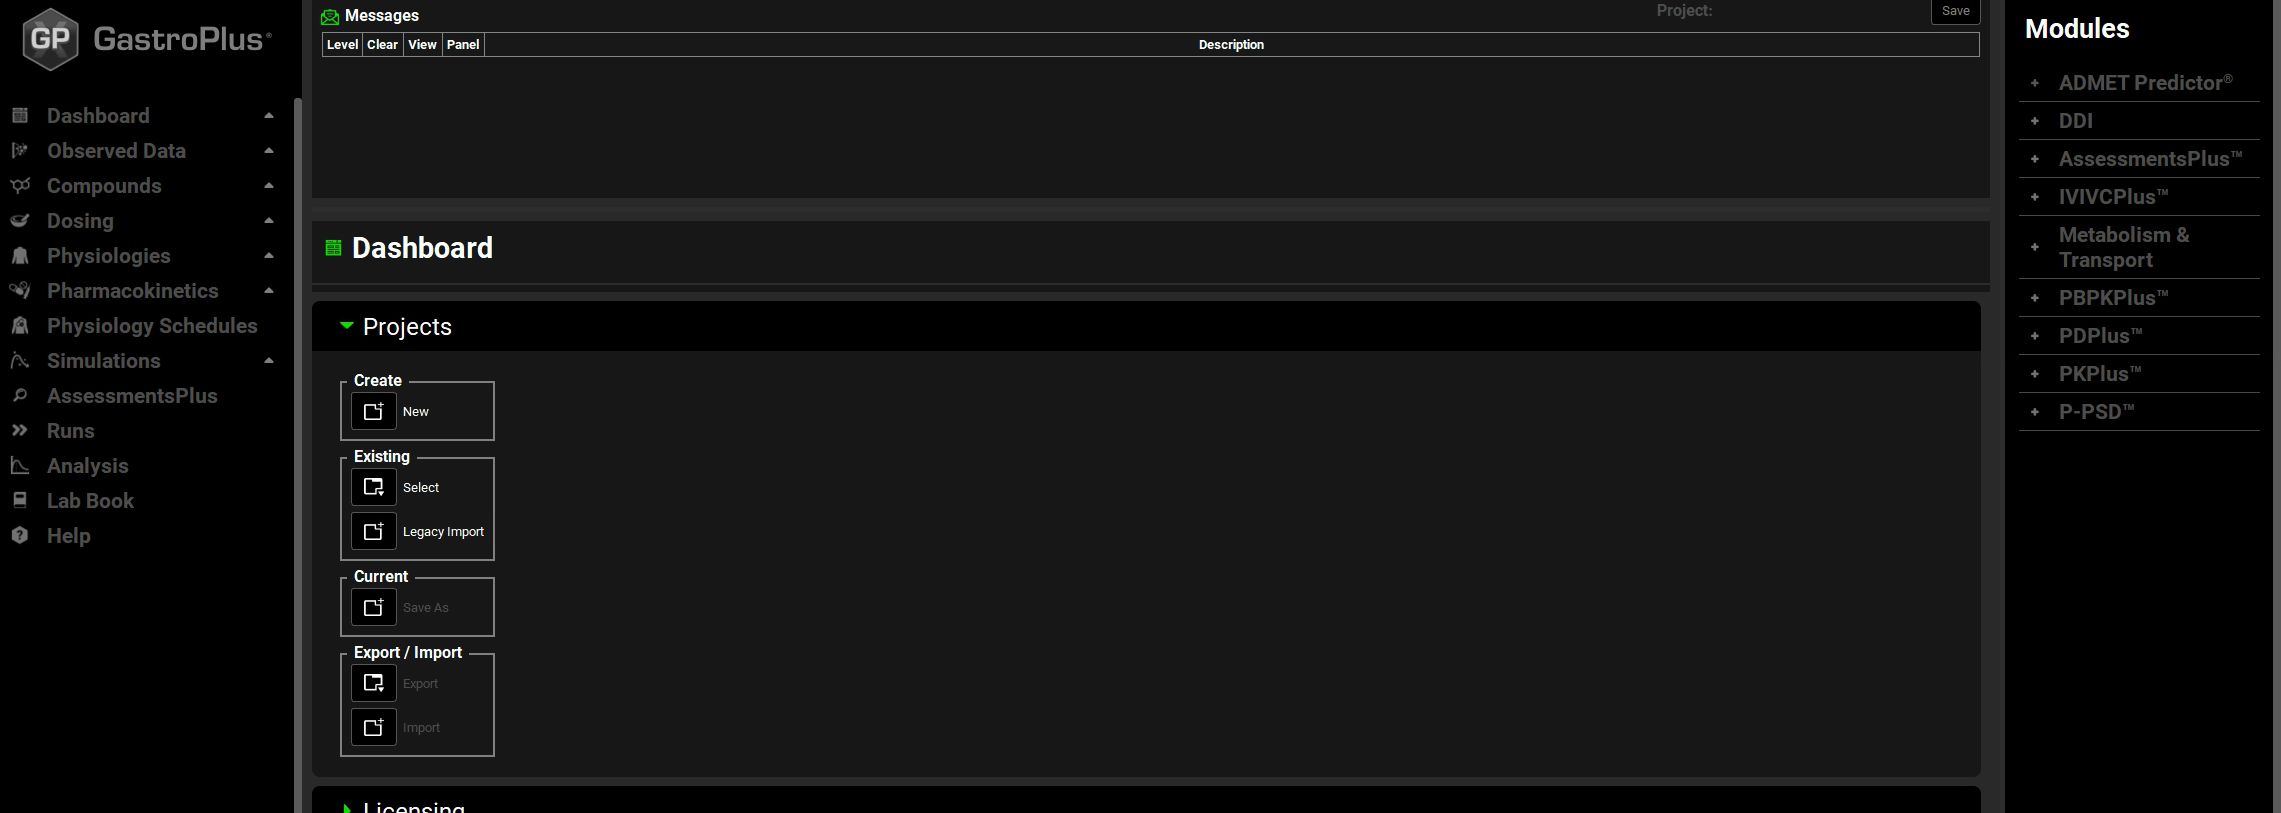
In the Projects panel, under Create, click on the icon next to New.
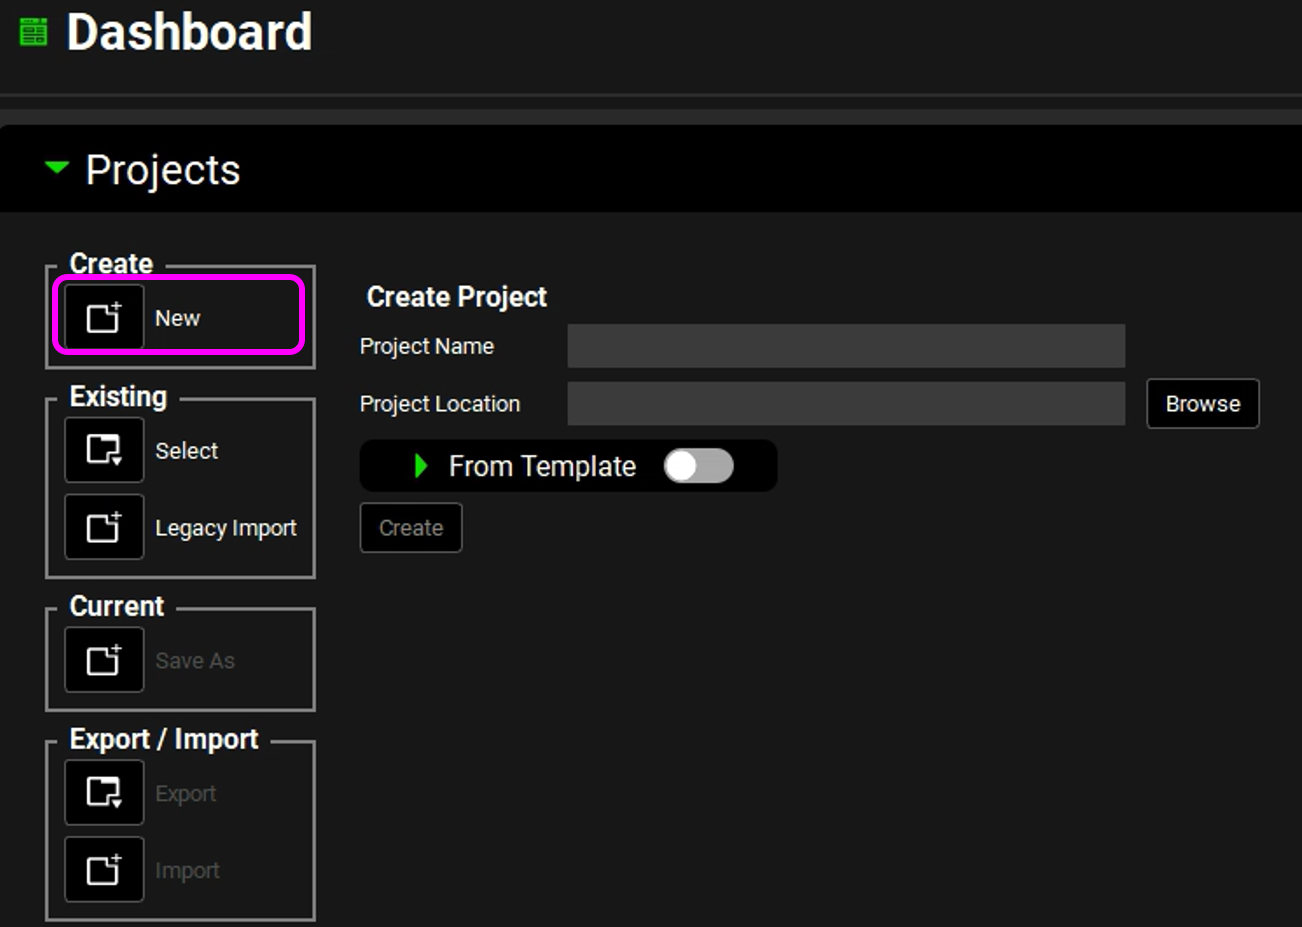
In the Project Name field, enter “My template 1”.
Next to the Project Location field, click on Browse. Browse to and select the folder in which to store the GPX™ project, and then click on Select Folder.
After selecting the folder, the Project Folder dialog box closes. The project name (My template 1) is displayed in the Project Name field, and the full path to the storage folder is displayed in the Project Location field. The Create button is now enabled.
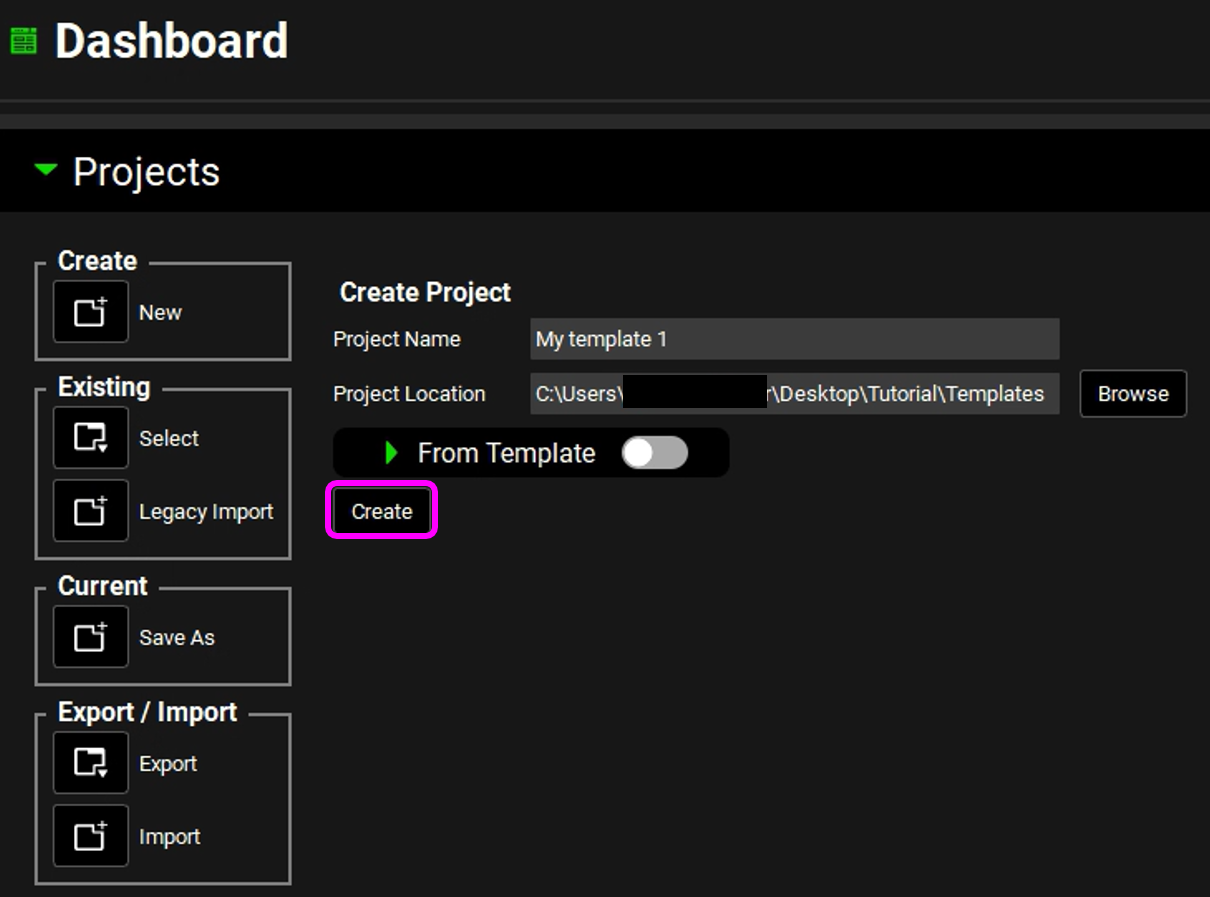
Click on Create.
The project is created. The project name (My Template 1) is displayed in the Project field on the top right corner of the interface. An active Save button is displayed next to the project name. All components on the GPX™ main window are now enabled.

Adding template assets
When creating a GPX™ project template, the most basic template that allows for the importing of a molecule (if you have an ADMET Predictor® license) has the following assets defined: a formulation, a dosing schedule, and a physiology; however, you can define any of number of assets with the appropriate parameters as is suitable for your GPX™ project template.
This basic template is also useful if you are not licensing ADMET Predictor®, as you can manually add a Compound asset and input the physicochemical properties.
Adding a Dosing asset
For a Dosing asset, you must define how the compound is formulated (for example, as an oral tablet), and the dose strength (for example, 10 mg, 20 mg, and so on).
Open the Dosing view by clicking on Dosing in the Navigation Pane.
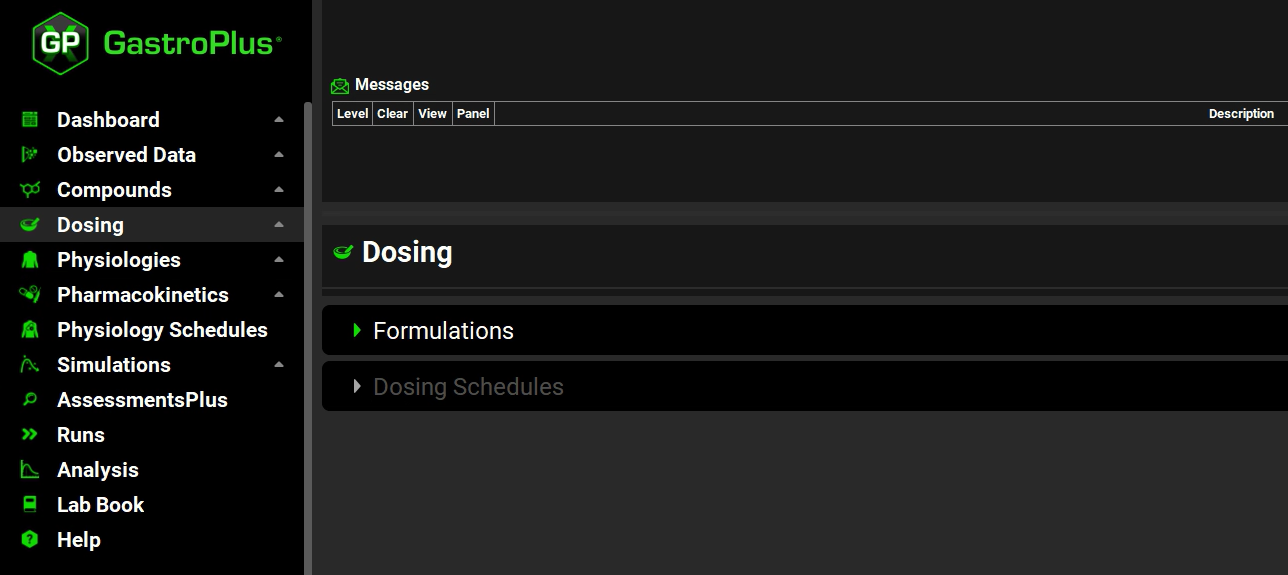
Remember, although the Dosing view consists of two panels, Formulations and Dosing Schedules, initially, “Dosing Schedules” is grayed out because you cannot specify a dosing schedule until you have added at least one formulation.
Expand the Formulations panel by double clicking on the panel or clicking on the green arrow.

Click on Add. The Enter Formulation name dialog box opens. Enter “IR Tablet”, and then click on OK.
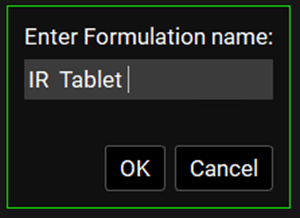
The Enter Formulation Name dialog box closes. The Dosing view remains open. All relevant components in the Dosing view, including the Dosing Schedules panel, are now enabled. The following parameters are set to their default values: Route = Oral, Dose Form = Tablet, Release = Immediate, and Location = Gastric. Leave the default values for Route, Dose Form, Release, and Location as-is.
The Enter Formulation Name dialog box displays a free text field, which means that the value that you enter in the field does not impact the value of any other parameter. Although you entered IR Tablet for the formulation, the values of Route = Oral and Dose Form = Tablet, etc. were not populated based on what you named the formulation. They were simply populated with their default values of Oral, Tablet, etc. If you had entered the value of “Intravenous,” then Route, Dose Form, etc. would again be populated with these same default values. Therefore, when you are creating a project template for a different formulation, such as intravenous, you must select the correct values for Route, Dose Form, etc. before you continue.
Expand the Dosing Schedules panel.
Click on Add. The Enter Dose Schedule name dialog box opens. Enter “Oral IR Tablet 100mg”, and then click on OK.
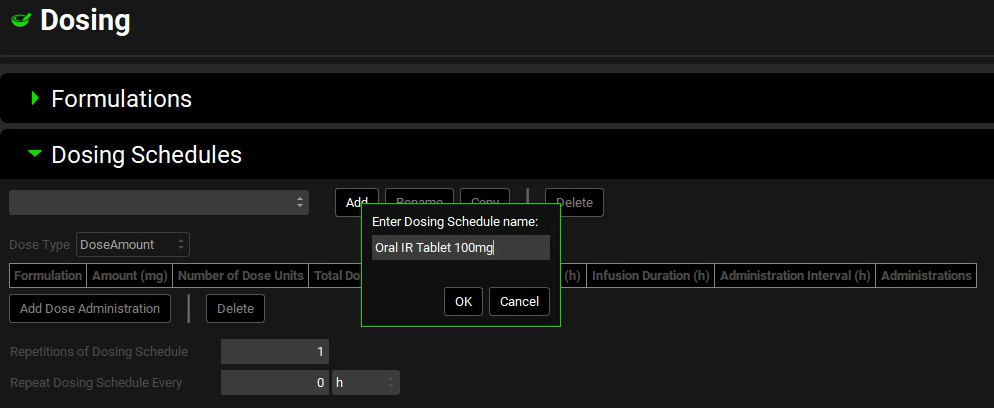
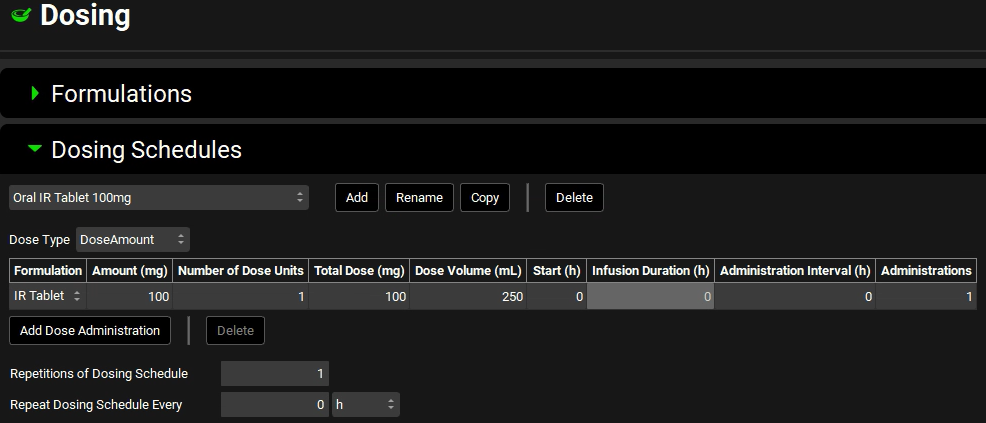
The formulation that you previously defined (IR tablet) is displayed in the Formulation field. The remaining Dosing Schedule parameters are set to their default values including Amount (mg) = 100 and Number of Dose Units = 1, Volume (mL) = 250.
You have now created a 100mg oral tablet dosing schedule.
Adding a physiology asset
Open the Physiologies view by clicking on Physiologies in the Navigation Pane.
Click on Add. The Enter Physiology name dialog box opens.
Enter “Human 30YO 85kg”, ensure Human is selected as species, and then click on OK.

The Enter Physiology dialog box displays a free text field, which means that the value that you enter in the field does not impact the value of any other parameter. Although you entered Human 30y 85kg for the physiology, the values of Species = Human, Age = 30 y, etc. were not populated based on this information. They were simply populated with their default values of Human, 30y, etc. If you had entered the value of “3y 25k Dog,” then Species, Age, etc. would again be populated with these same default values. Therefore, when you are creating a project template for a different physiology, such as Dog, you must select the correct values for Species, Age, etc. before you continue.
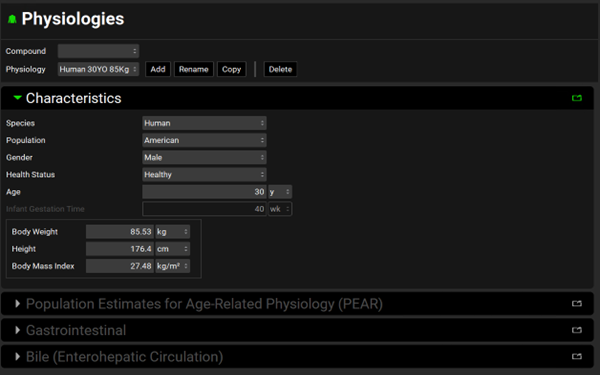
The Enter Physiology dialog box closes. The Physiology view remains open. All components in the Characteristics panel are now enabled. You have now added a Human 30 years old, 85kg physiology.
The Characteristics panel is automatically opened, and its parameters are populated with their default values, including Species = Human, Population = American, Gender = Male, Health Status = Healthy, and Age = 30 y. The other panels in the Physiologies view are grayed out because a compound asset hasn’t been created yet.
The default selection for the Meals > Fed State parameter that is located on the Gastrointestinal panel is Fasted, which is pertinent information when you are considering the simulation projects that you can create based on this template.
Leave the default values for all physiology parameters.
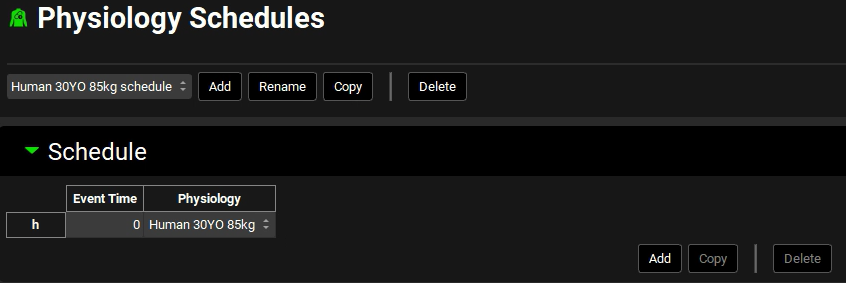
After you add a physiology, a single corresponding physiology schedule for a Human 30YO 85kg is automatically created. Open the Physiologies Schedules view to confirm that this single schedule was created.
Click on Save in the top right-hand corner of the interface, and then click OK in the Save completed dialog box.
You are now ready to save this GPX™ project as template. You can then use this template to create new GPX™ projects.
Saving GPX™ projects as a template
Go to the Dashboard view and open the Projects panel if not already opened.
Under Current, click on the icon next to Save As. The Projects panel is updated with Save As options for saving the currently loaded GPX™ project.
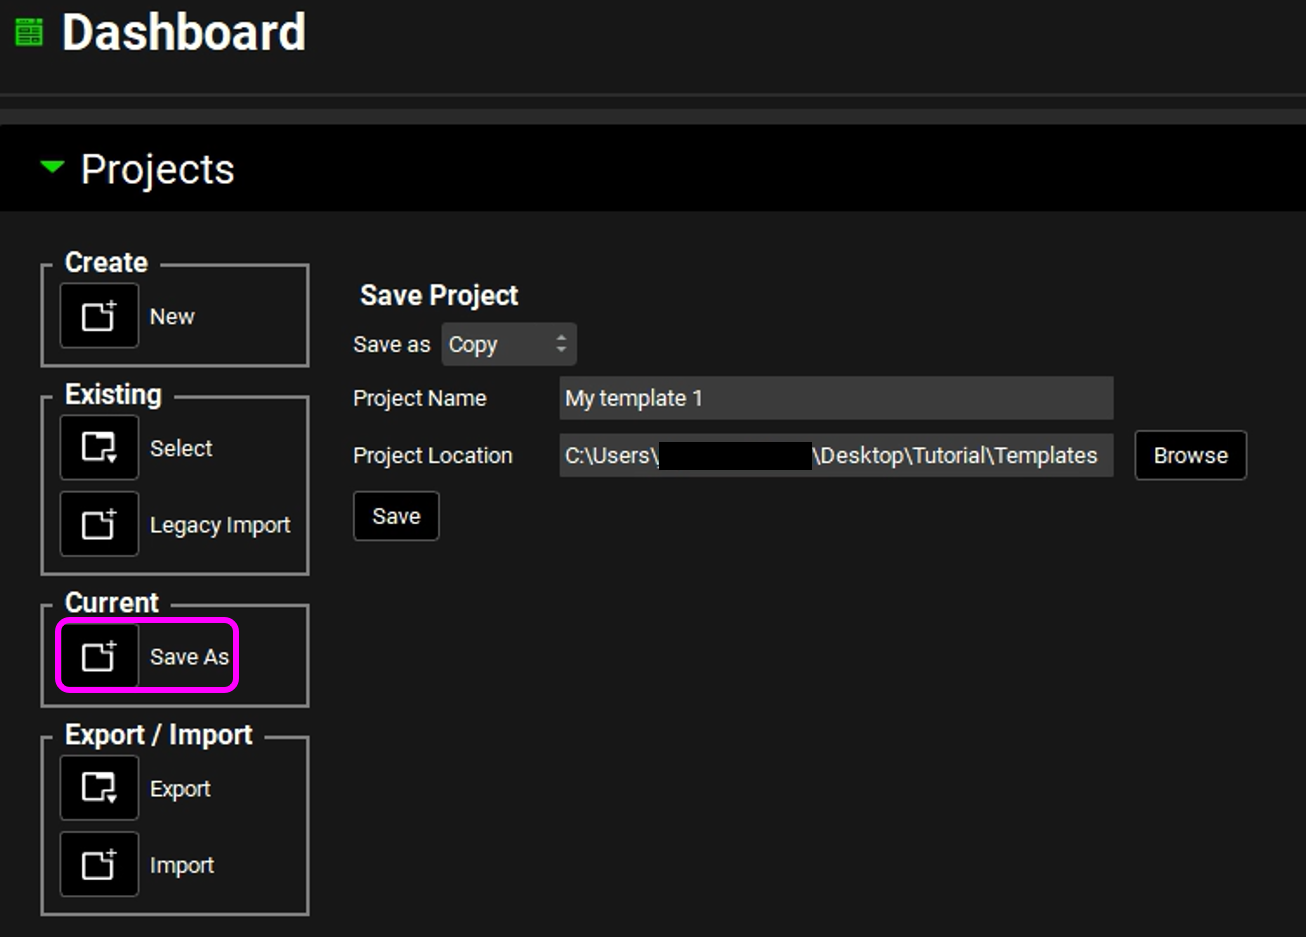
From the Save as drop-down list, select Template.
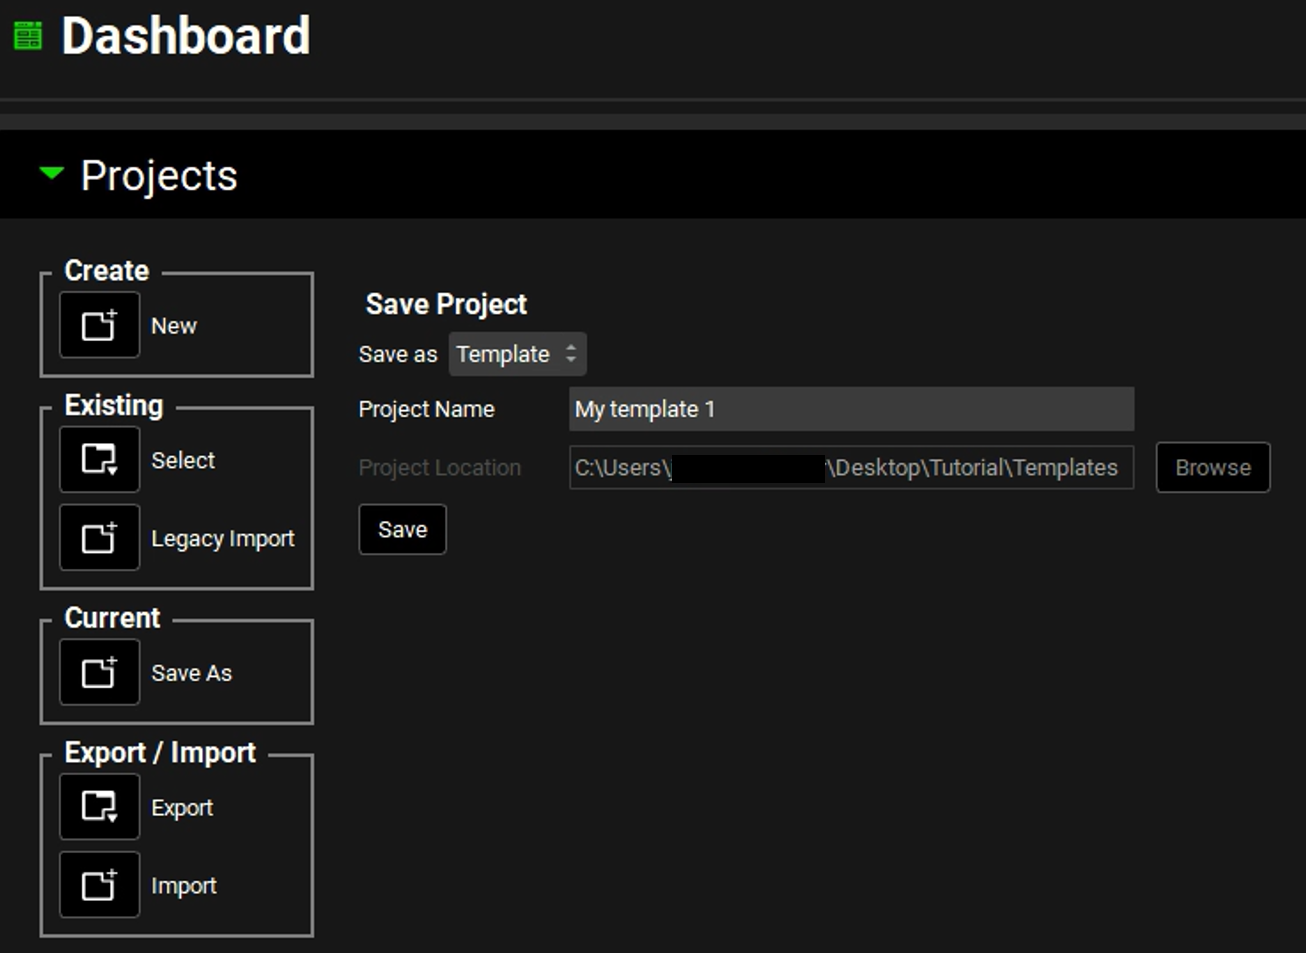
The Projects panel in the Dashboard view is updated to show Template, and the Project Location field is grayed out. The Project Name field remains editable and the Save button remains active.
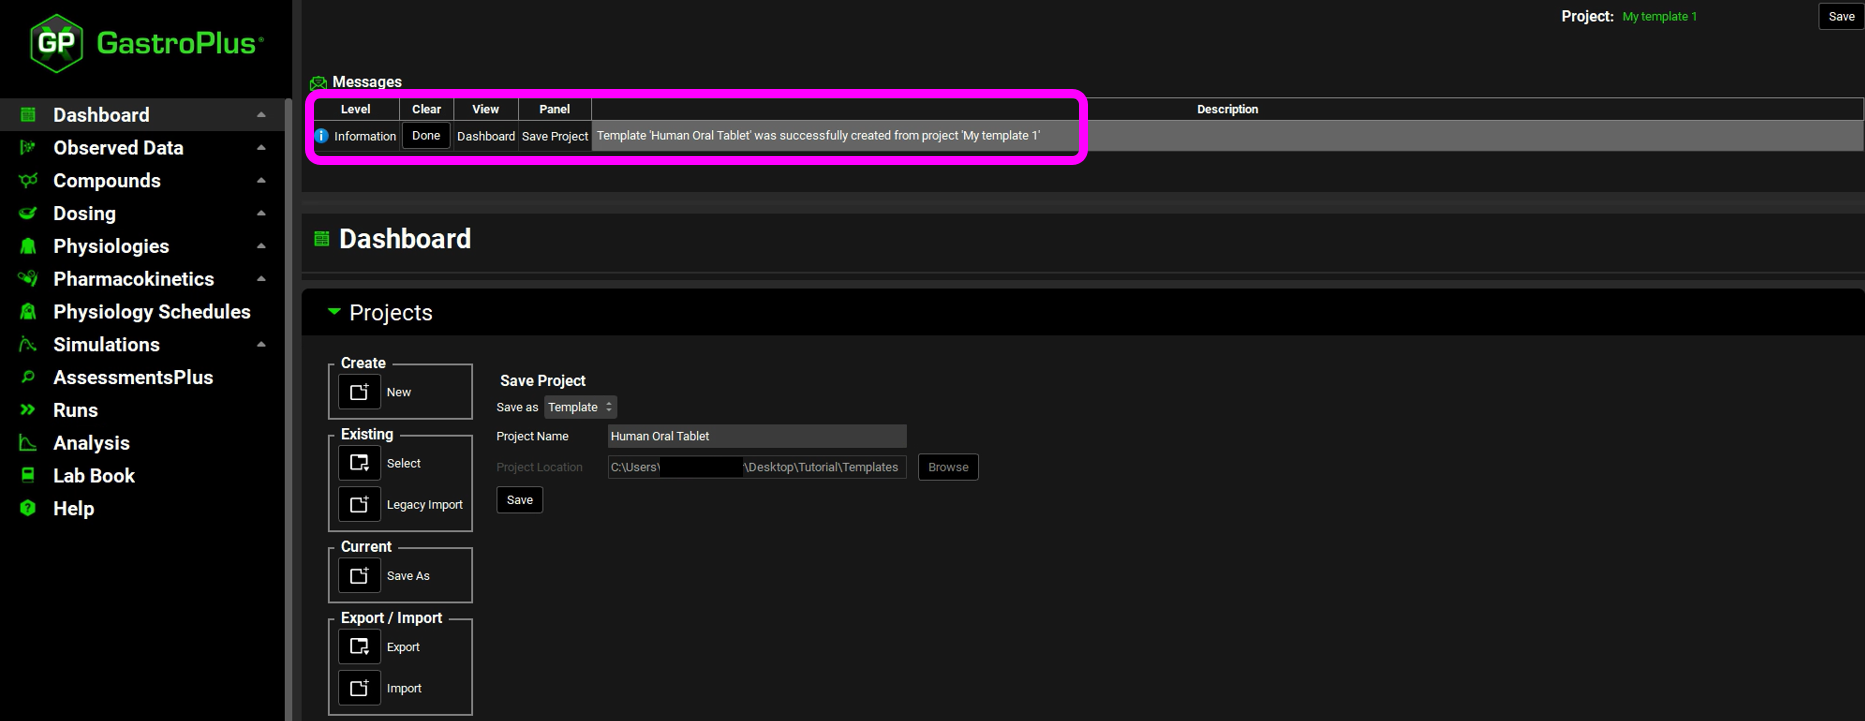
In the Project Name field, edit the project name to appropriately reflect its parameters. For example, edit the text to indicate the formulation, dosing, and physiology assets for the template “Human Oral Tablet”. In the Projects panel, click Save.
You have now successfully created a GPX™ template. A message indicating this is displayed in the Messages Center. Click on Done in the message center to dismiss the message.
Creating a new GPX™ project from a template
If GPX™ is already open, then continue to Step 2; otherwise, open GPX™ and in the Dashboard view open the Projects panel.
In the Projects panel, under Create, click on the icon next to New.
The Project panel displays the options for creating a new project.
Click on the toggle next to From Template.
The toggle turns green indicating that it is On, and the list of all available templates is displayed. By default, the first template in the list is automatically selected.
Select the previously created template (Human Oral Tablet).
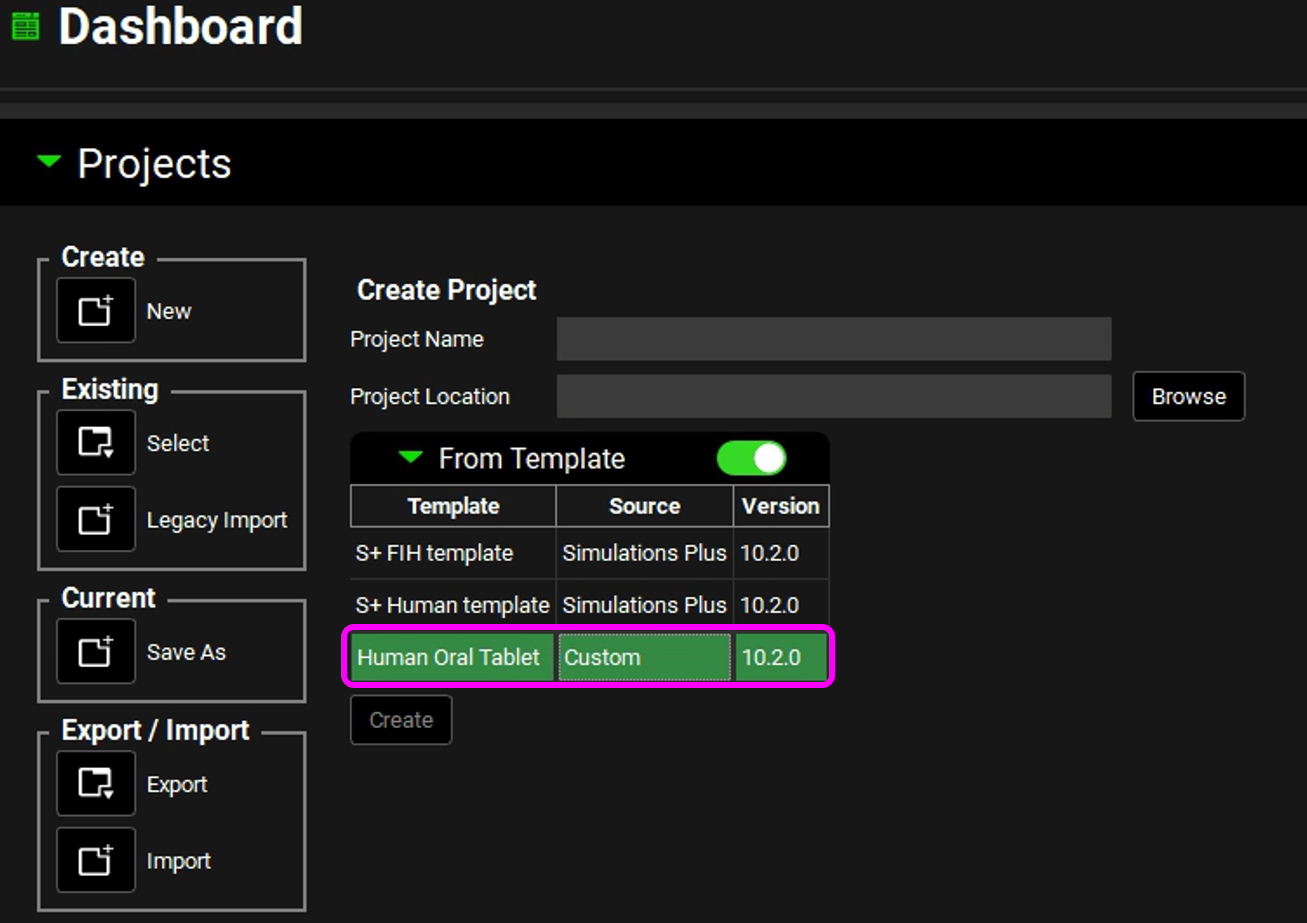
Enter the Project Name of “Piroxicam”. Browse to and select the folder in which to store the GPX™ project, and then click on Select Folder. Click on Create and then Yes.
The project that you created is based on the selected template. In this tutorial, your project would have a single formulation (IR Tablet) with one dosing schedule (100 mg), and a 30YO 85kg Human physiology.
Go to the next view on the Navigation Pane– Observed data.
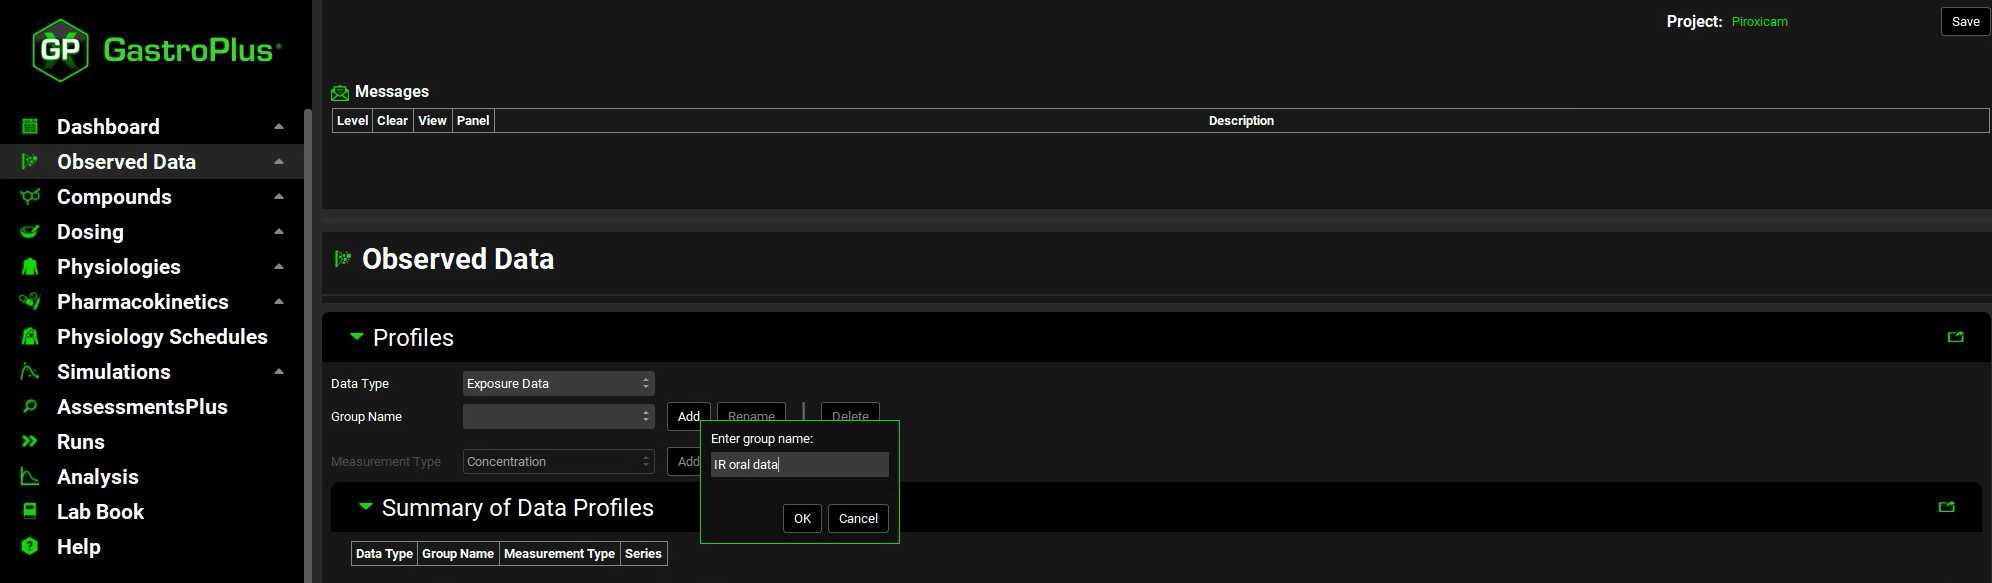
Expand the Profiles Panel.
The Exposure Data is selected as the default Data Type. To input any other type of data, such as dissolution, use the Data Type drop-down menu to select it.
Leave the Data Type as the default selection as in this tutorial we will enter exposure data.
Click Add next to Group Name. The Enter group name dialog opens. Type “IR oral data” for the group name and then click on OK.
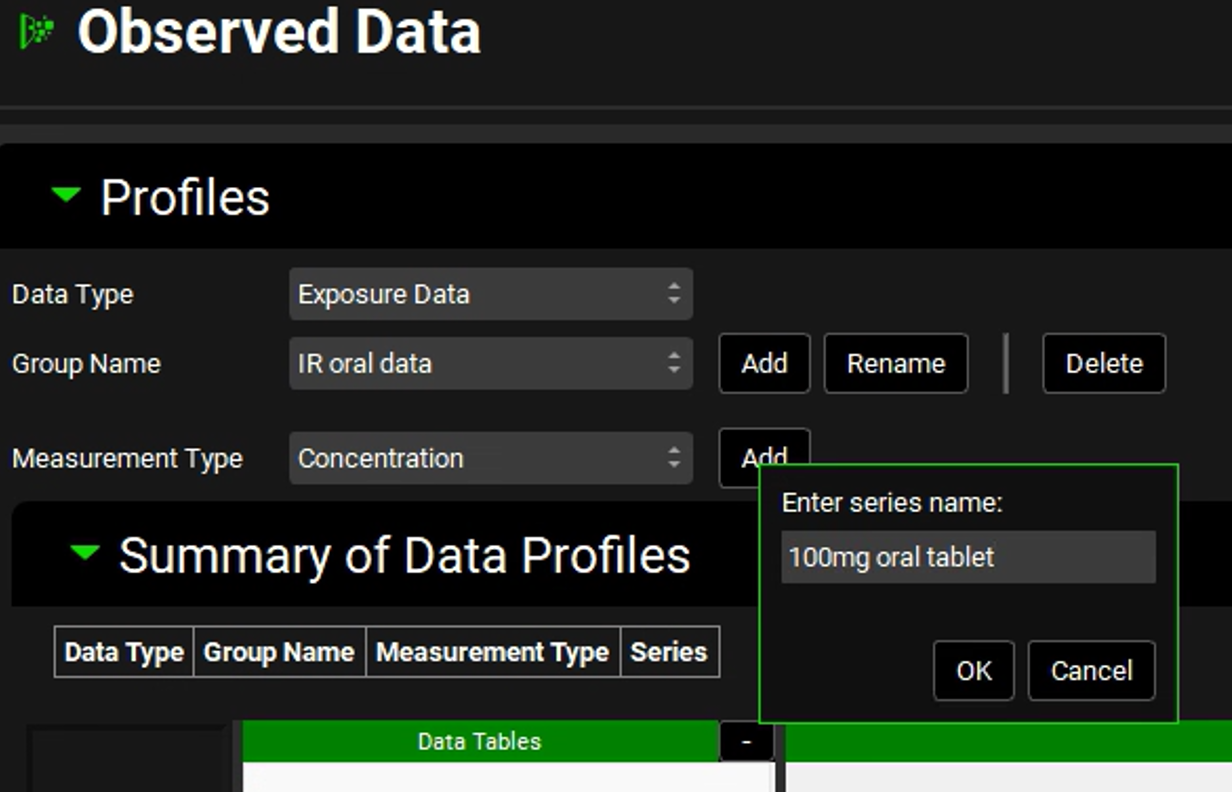
We will input plasma concentration data for a 100 mg oral tablet administration. Therefore, leave Concentration selected, click Add next to Measurement Type, enter “100mg oral tablet” and click on OK.
Concentration is selected as the default Measurement Type. To input another type of measurement, such as mass, use the drop-down menu to select it.
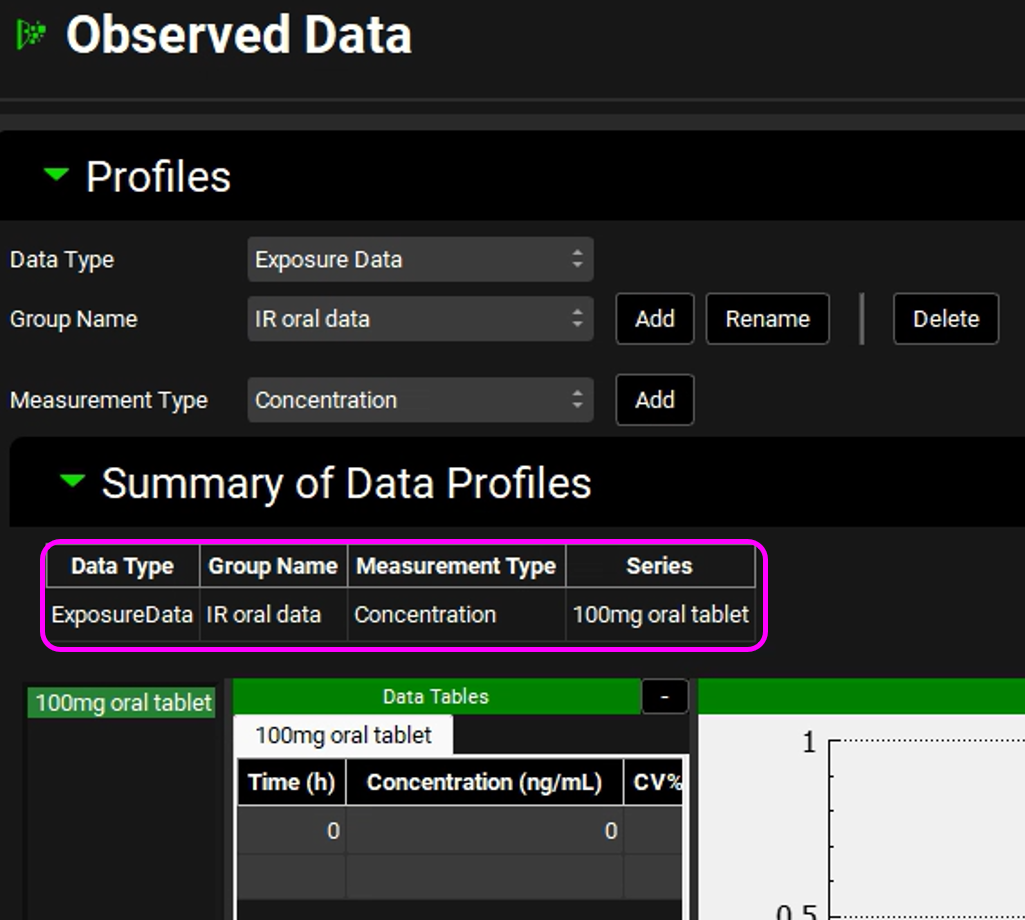
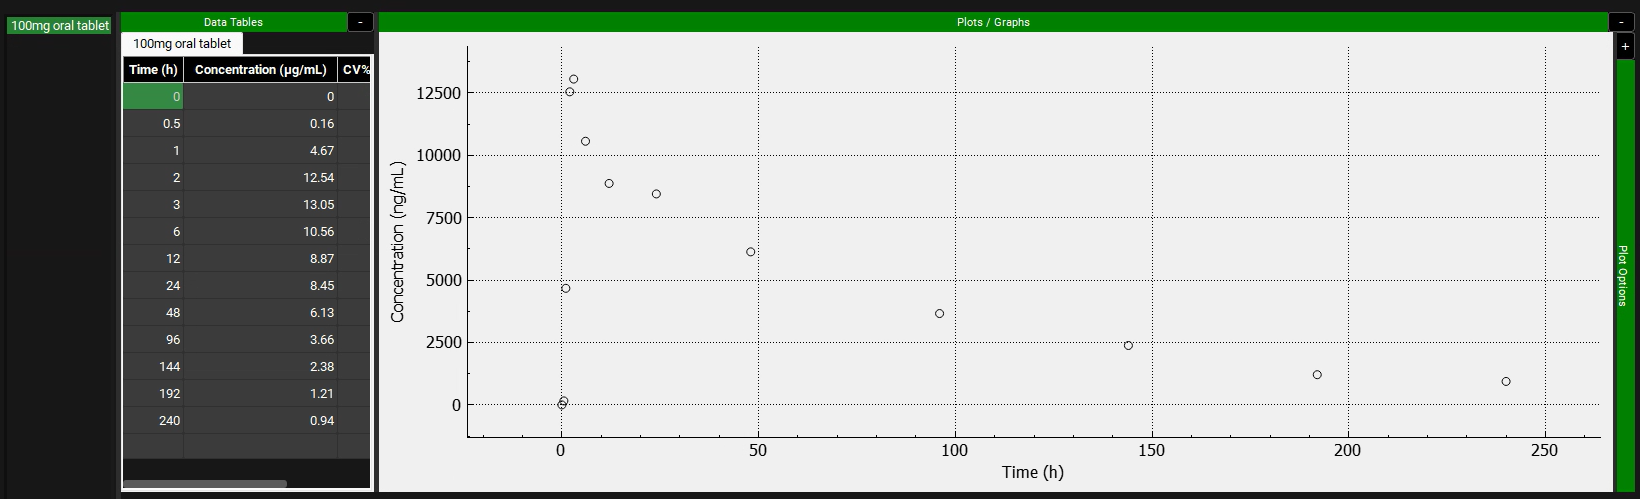
The newly created dataset will appear in the Summary of Data Profiles panel. The list will get updated with each newly created data profile.
Go to following path in Windows file explorer
C:\Users\<user>\AppData\Local\Simulations Plus, Inc\GastroPlus\10.2\Tutorials\Piroxicam and select the “Piroxicam” spreadsheet.
We will use the data provided in the “Piroxicam” spreadsheet, which is in µg/mL. The default unit in the Data Table is ng/mL, so before entering the data, the unit needs to be changed to µg/mL. To do so, click on the concentration header and a green colored drop-down will become available. Select µg/mL from the drop-down.
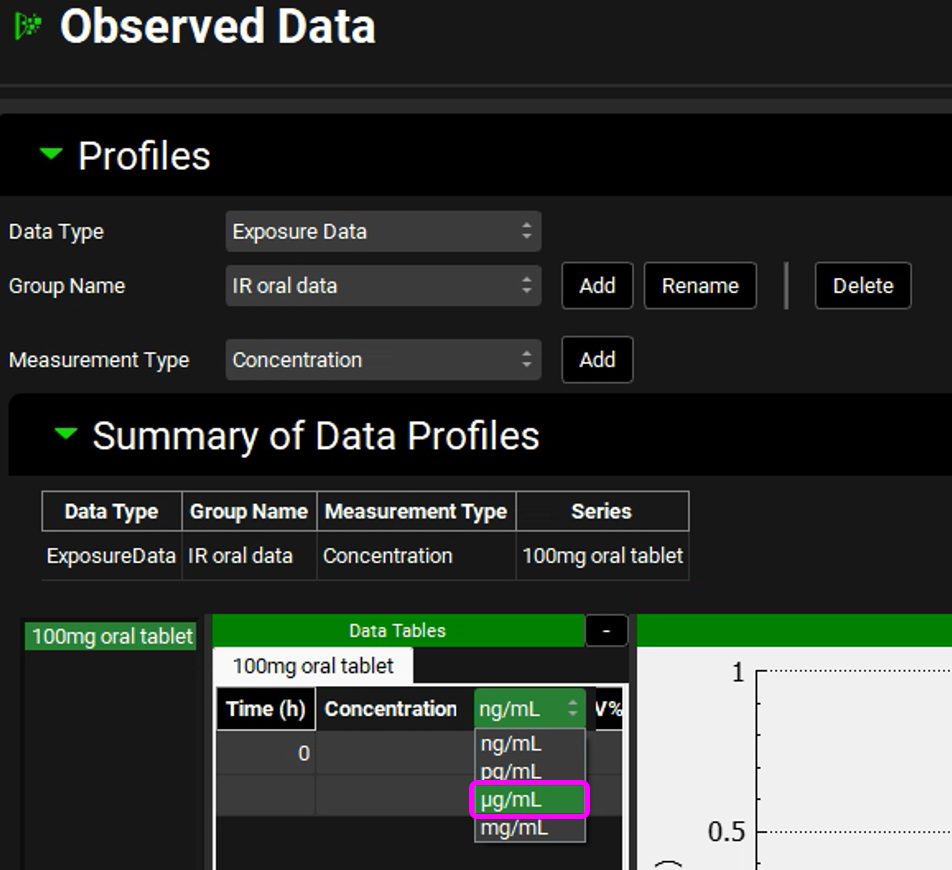
If you switch the units after entering the data, the values will be converted to the selected unit. So, make sure to select the unit first.
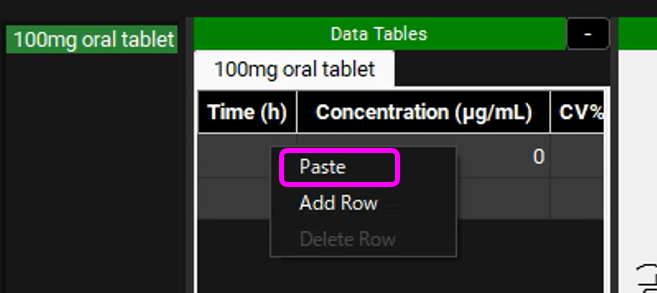
To enter the observed data profile in GPX™ you can either manually input it or copy from the Excel spreadsheet and paste it into the Data Tables by right clicking on the table and selecting “Paste”.
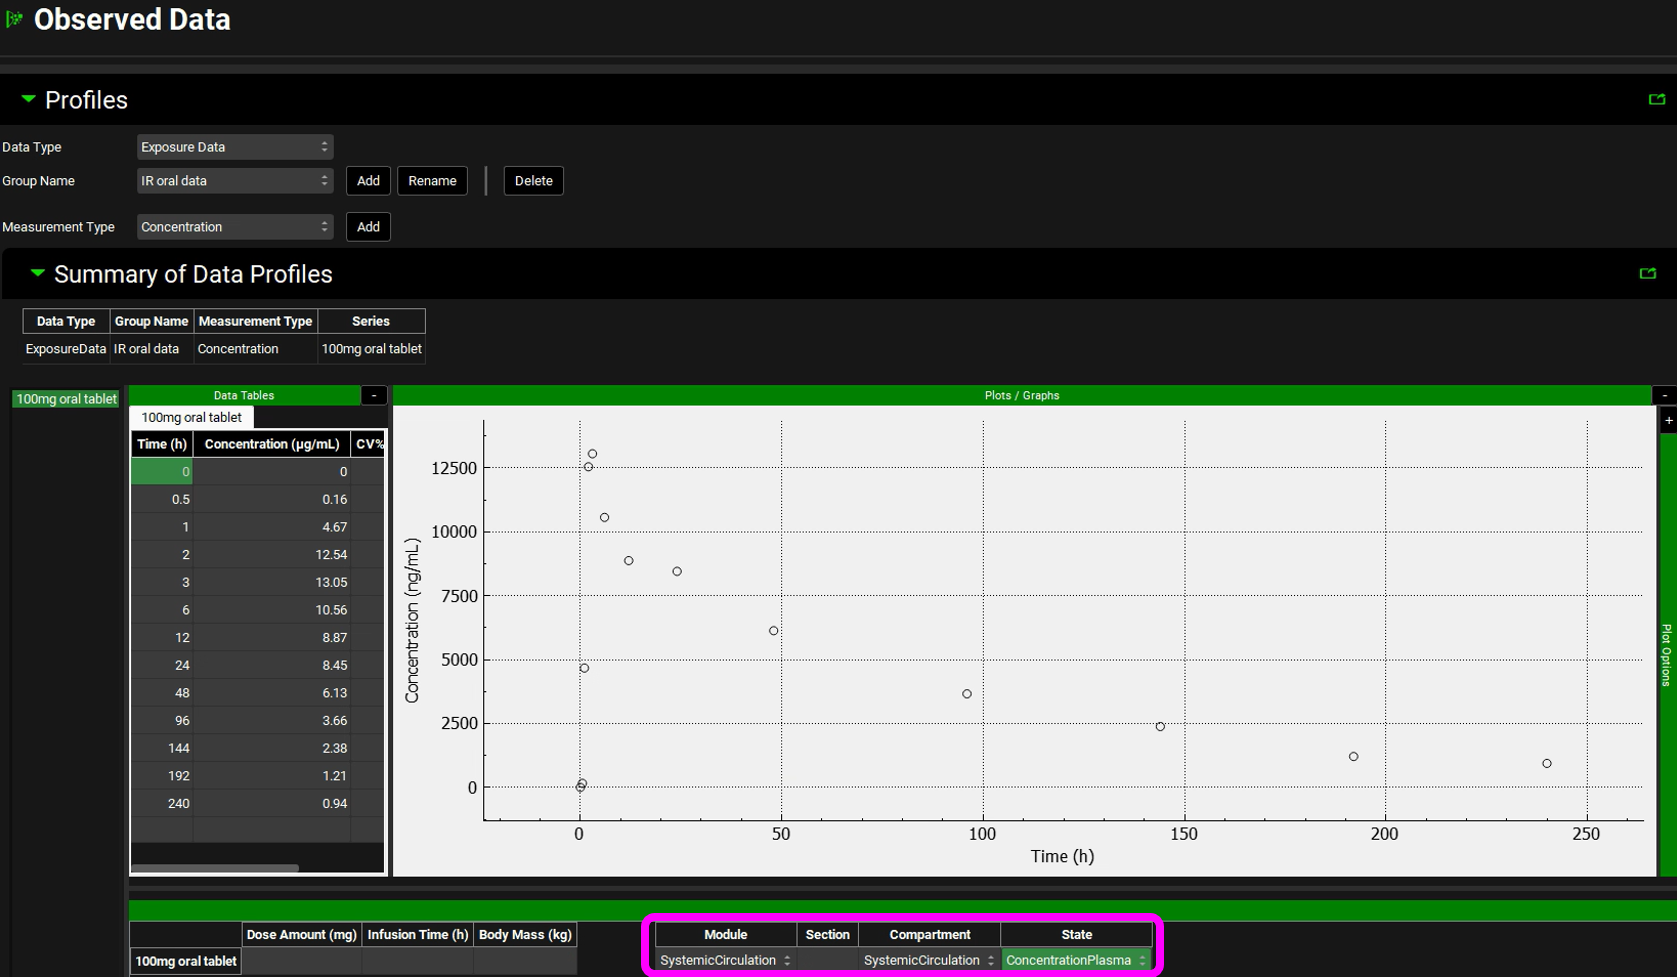
The observed exposure data needs to be mapped to its specific compartment.
When mapping plasma concentration data, the Module should be specified as Systemic Circulation. If you have other types of concentration data, such as tissue data, you can select it from the drop-down.
Save the project.
Open the Compounds view. If you have an ADMET Predictor® license, go to step number 14. If you don’t, proceed to step number 19.
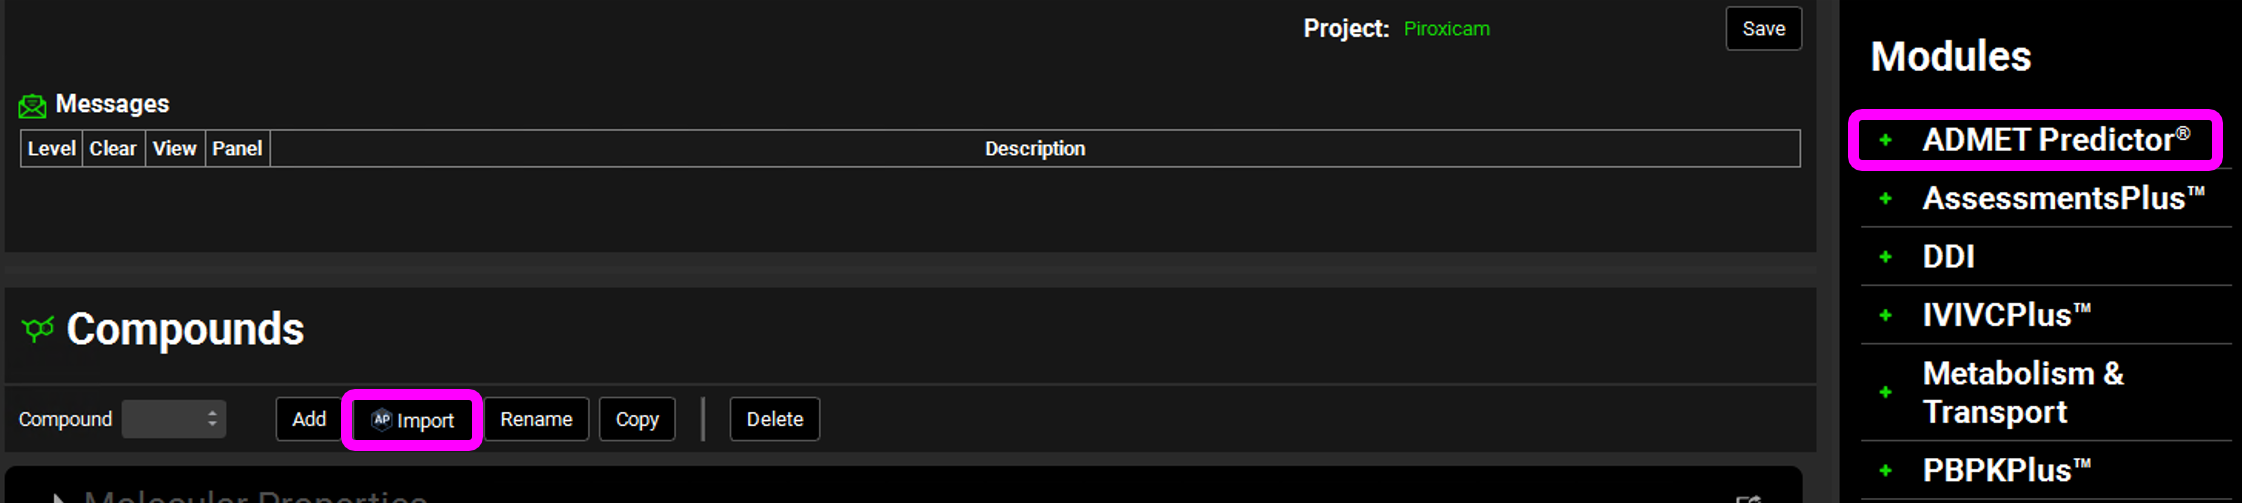
This project was created from a template with the minimum required assets to allow a molecule import. To open ADMET Predictor® click on the AP Import icon next to the Compound or click on ADMET Predictor® in the Modules Pane.
On the ADMET Predictor® view, under the General Settings panel, click on Select File. The Open Structure File window will open. Go to C:\Users\<user>\AppData\Local\Simulations Plus, Inc\GastroPlus\10.2\Tutorial\Piroxicam folder, select Piroxicam.mol file, and click open.
You can now select how you wish to import the molecule. Since this project only has one Dosing Schedule and one Physiology Schedule, those will be selected by default. If you have a project that has more than one of these assets, you can select it from the drop-down.
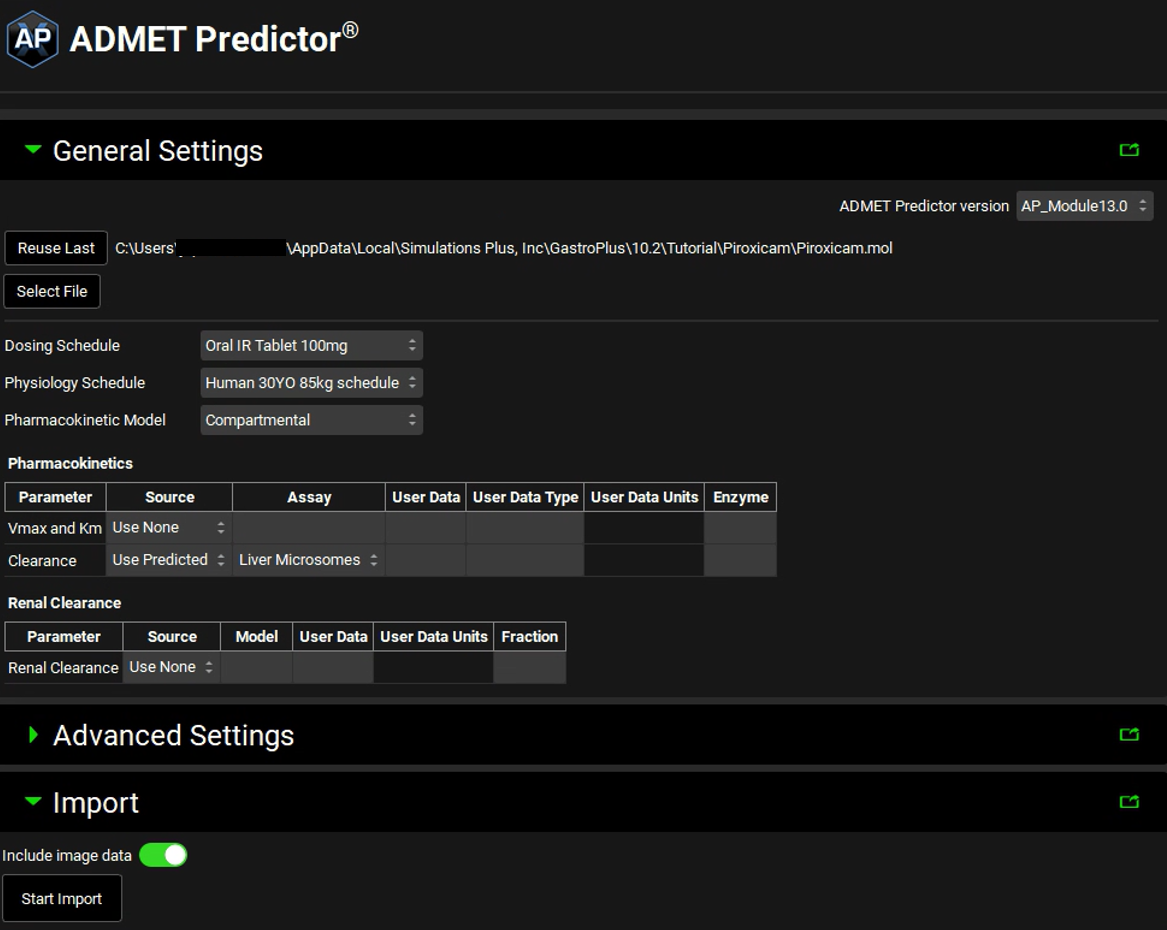
If you are licensing PBPKPlus™, you can import the molecule against a PBPK model by selecting Physiologically Based in the Pharmacokinetic Model drop-down.
In this tutorial, we will use the default selections for Pharmacokinetic Model (Compartmental) and for Clearance Use Predicted (shown in the figure above) based on Liver Microsomes Assay type.
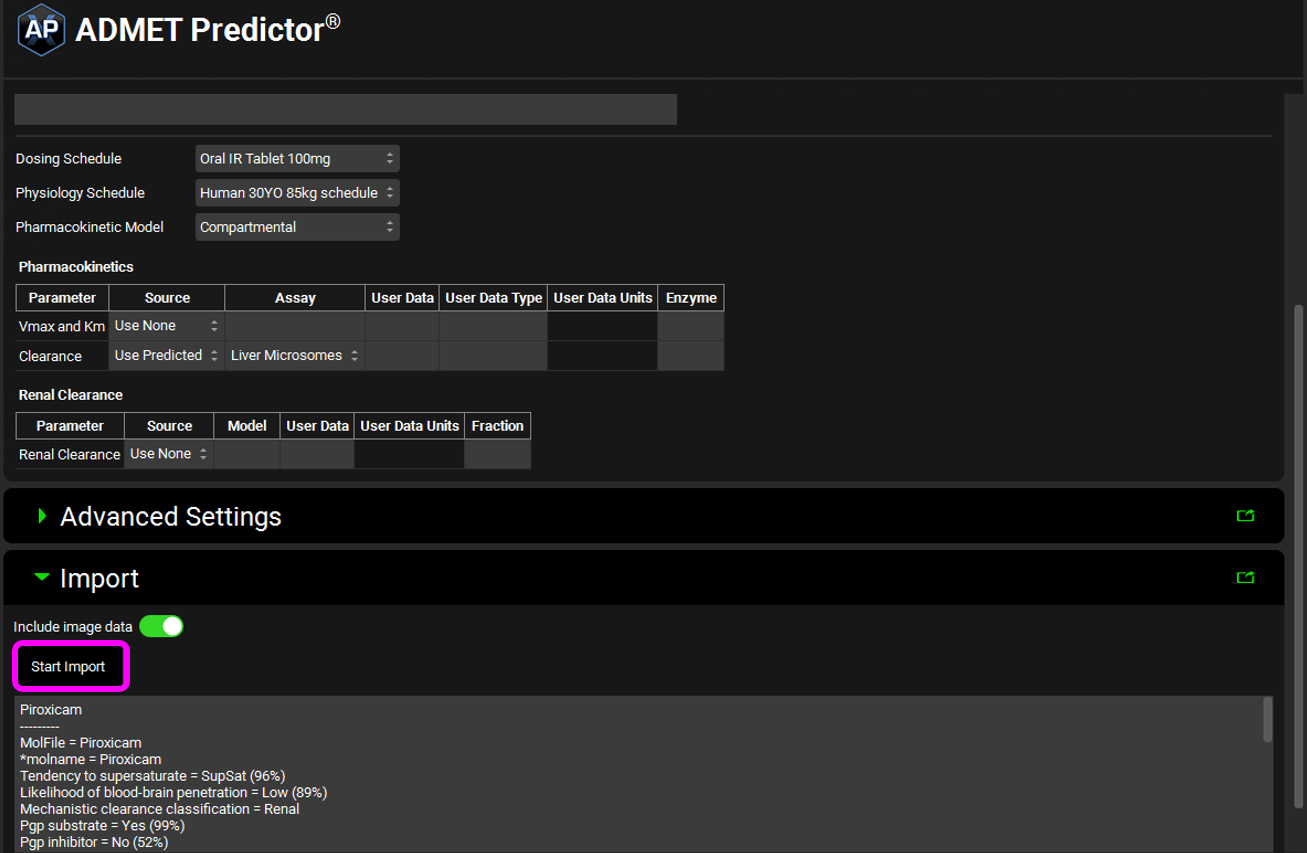
You are now ready to import a molecule. Select Start Import under the Import panel.
After the import has finished the log information will be displayed under the Start Import button.
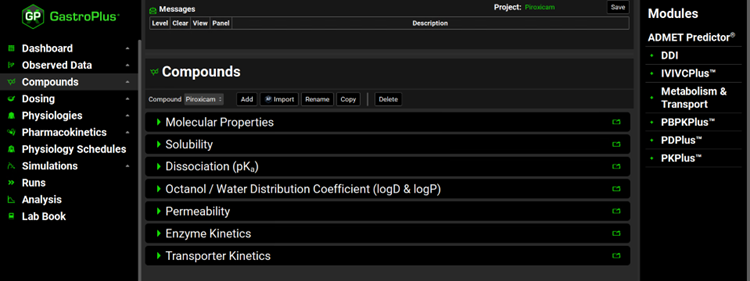
Return to the Compounds view. You will see that the compound name has been populated with Piroxicam, and all the panels are now available.
Move through the panels to see the predicted physicochemical properties.
Steps 19-20 show how to manually input physicochemical information for a compound. You can skip to step 22 if you’ve imported the molecule via ADMET Predictor®.
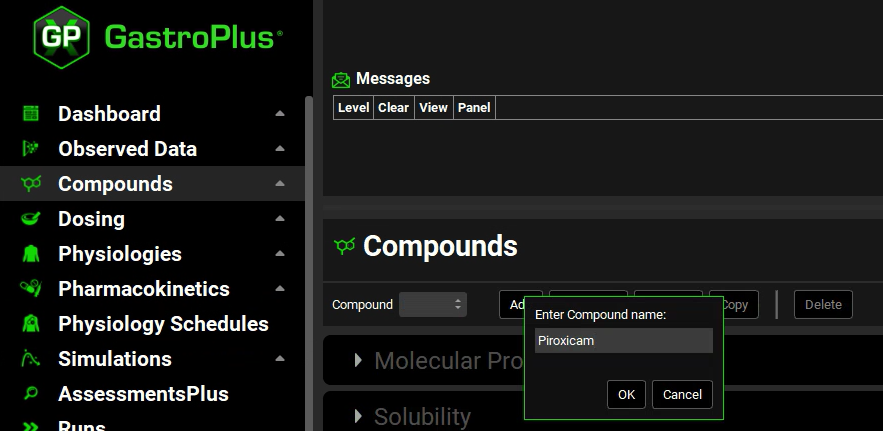
In the Compound view, click Add. The Enter Compound name dialog box will appear. Type “Piroxicam”.
Expand each panel in the Compound view and input the following parameters:
Molecular Properties
Molecular Weight: 331.4 g/mol
Diffusion Coefficient: 7.505e-06 cm2/s
Solubility
Solubility: 0.02014 mg/mL
pH: 4.982
Interfacial Tension: 0.02072 J/m2
Biorelevant In Vitro Solubilities
FaSSIF: 0.08377 mg/mL
FeSSIFV2: 0.4976 mg/mL
Dissociation (pKa)
Acid / Base | pKₐ | Solubility Factor |
Acid | 10.83 | 744.4 |
Acid | 5.654 | 744.4 |
Base | 2.608 | 744.4 |
Octanol/ Water Distribution Coefficient (LogD & LogP)
LogP: 1.926
Permeability
Source: Human
Input Permeability: 2.72e-04 cm/s
Paracellular - Zhimin
Hydrodynamically Equivalent Spherical Radius: 5.362 Å
Mean Projected Radius: 5.731 Å
Since this project was created from a template, it already has a Formulation, a Dosing Schedule, a Physiology, and a Physiology Schedule pre-defined.
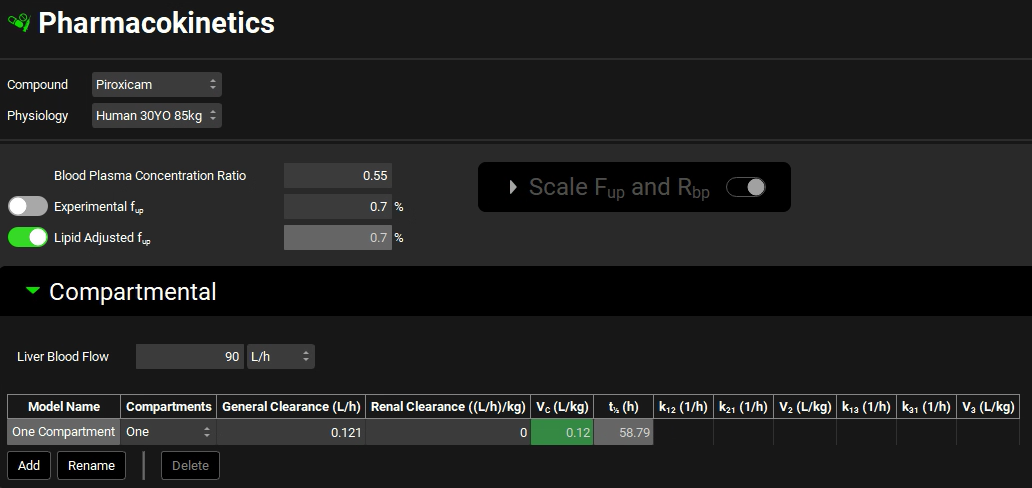
Open the Pharmacokinetics View.
Update the Blood Plasma concentration ratio and Experimental Fup to the measured/verified values of 0.55 and 0.7% respectively.
Expand the Compartmental panel.
If you have imported your molecule via ADMET Predictor®, a one compartmental pharmacokinetic model (“Human One Compartment”) was created upon import.
If you have manually created the compound, a one compartmental pharmacokinetic model (“One Compartment”) is also created.
In either case, update the General Clearance and Vc to the reported values below:
Compartments: One
General Clearance: 0.121 L/h
Vc: 0.12 L/kg
If your units for General Clearance are (L/h)/kg deselect the per bodyweight by clicking in the unit in the column header and uncheck the white box by clicking in it.
With all the assets created, you are ready to create and run a simulation.
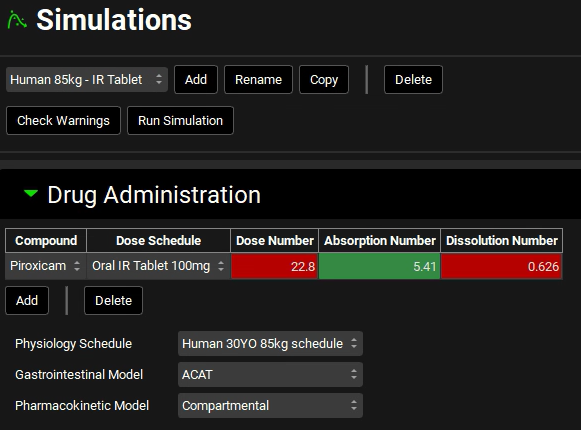
Open the Simulations view.
If you have imported your molecule via ADMET Predictor®, a simulation was automatically created upon import (Simulation for Piroxicam). Click on Rename, the Enter Simulation name dialog box appears, type Human 85kg - IR Tablet and then click OK.
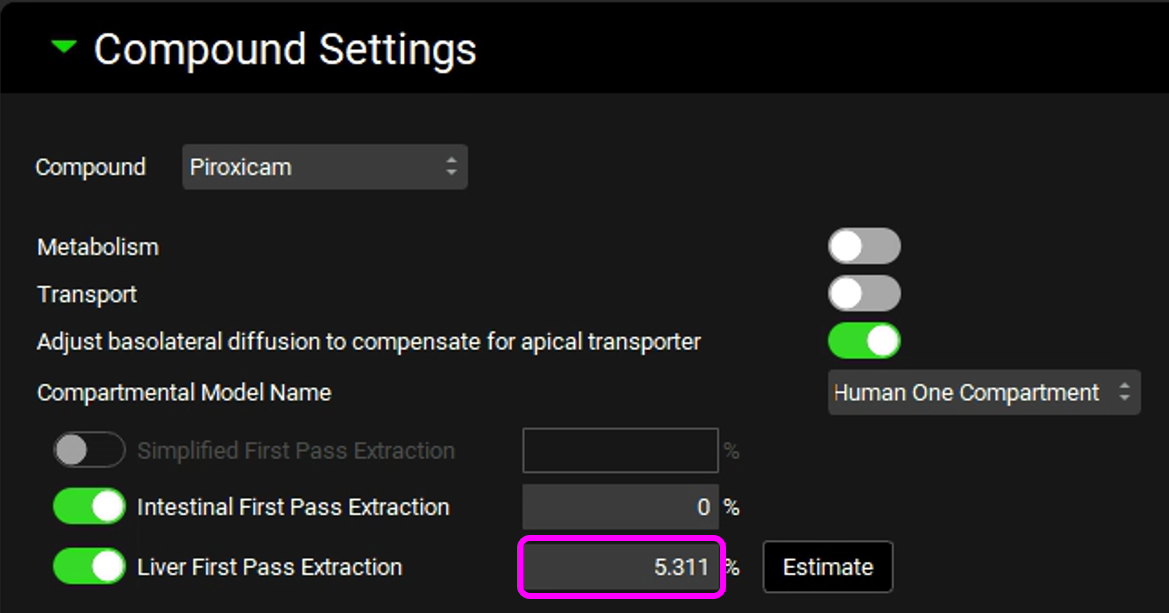
If you have not imported your molecule via ADMET Predictor®, click Add, the Enter Simulation name dialog box appears, type Human 85kg - IR Tablet and then click OK. Then, expand Compound Settings panel and set Liver First Pass Extraction to 5.311%.
Since there is only one of each asset (Compound, Dose Schedule, Physiology Schedule, etc.) in this project, everything will be automatically populated with the existing assets.
If your project has more than one of these assets, then you can select the one you wish to use from the drop-down menu.
Navigate through the panels.
Open the Compound Settings panel and scroll down to the Observed Data sub-panel. Click on the Group Name drop-down and select the “IR oral data” observed data.


If you have imported your molecule via ADMET Predictor®, the name Piroxicam will appear in the Observed Pharmacokinetic Parameters settings input box. ADMET Predictor® creates a blank row in the Parameters sub-panel on the Observed Data view labelled with the name of the imported compound and will automatically select it when it sets up the simulation.
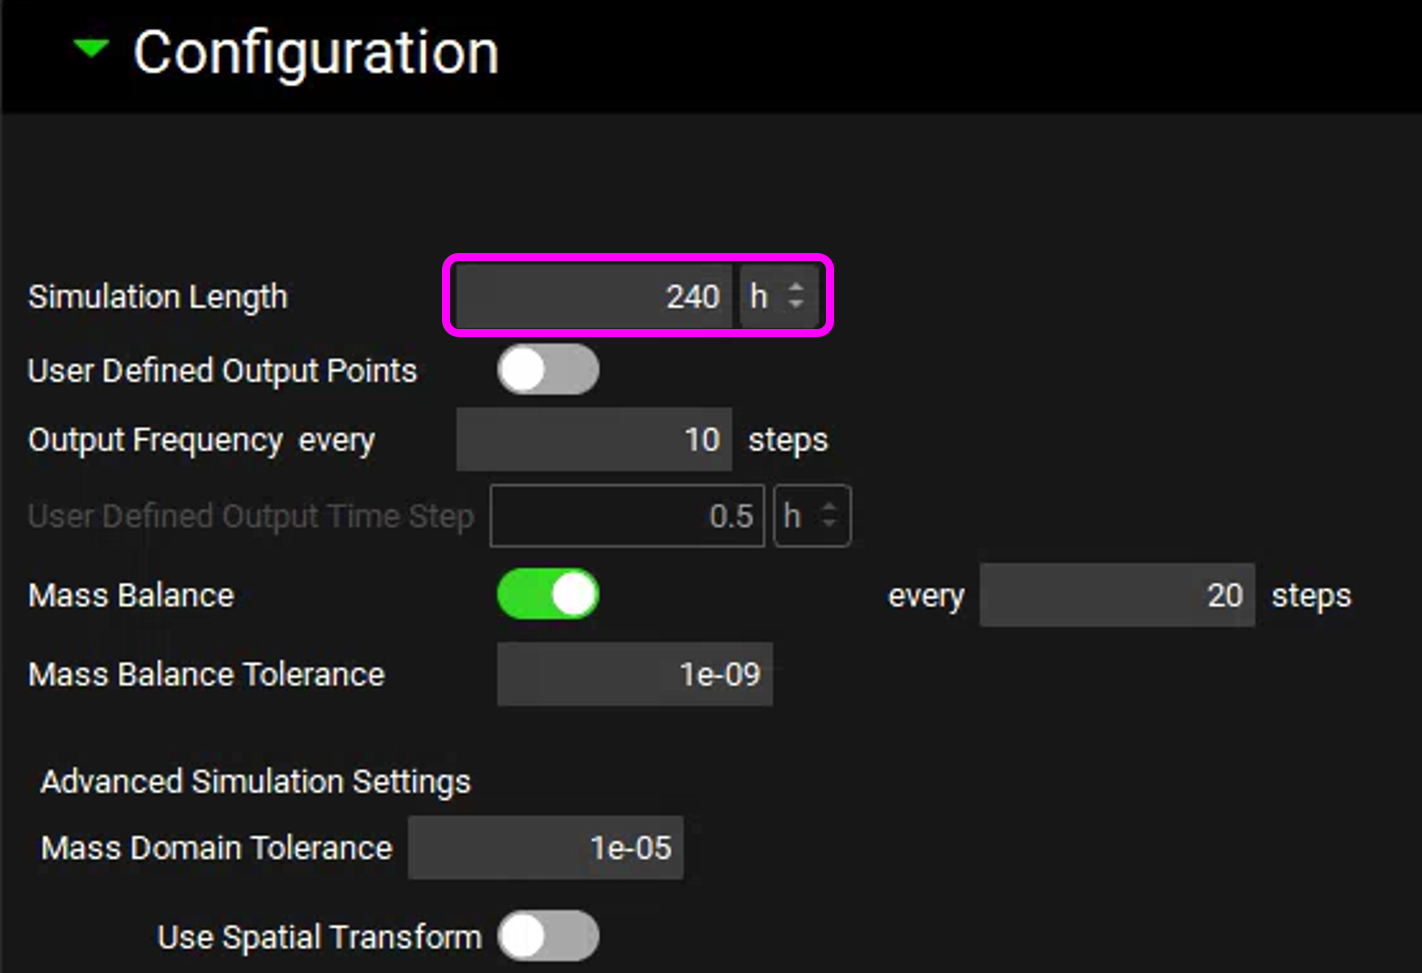
Open the Configuration panel and change the Simulation Length to 240 hours.
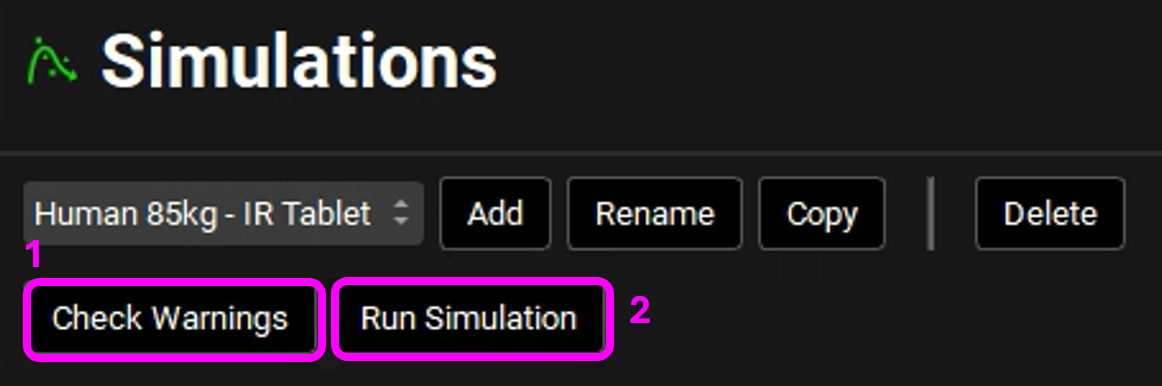
You are now ready to run the simulation. At the top of the Simulations view, click on Check Warnings. No warning messages should appear in the Messages center at the top. Then, click on Run Simulation.
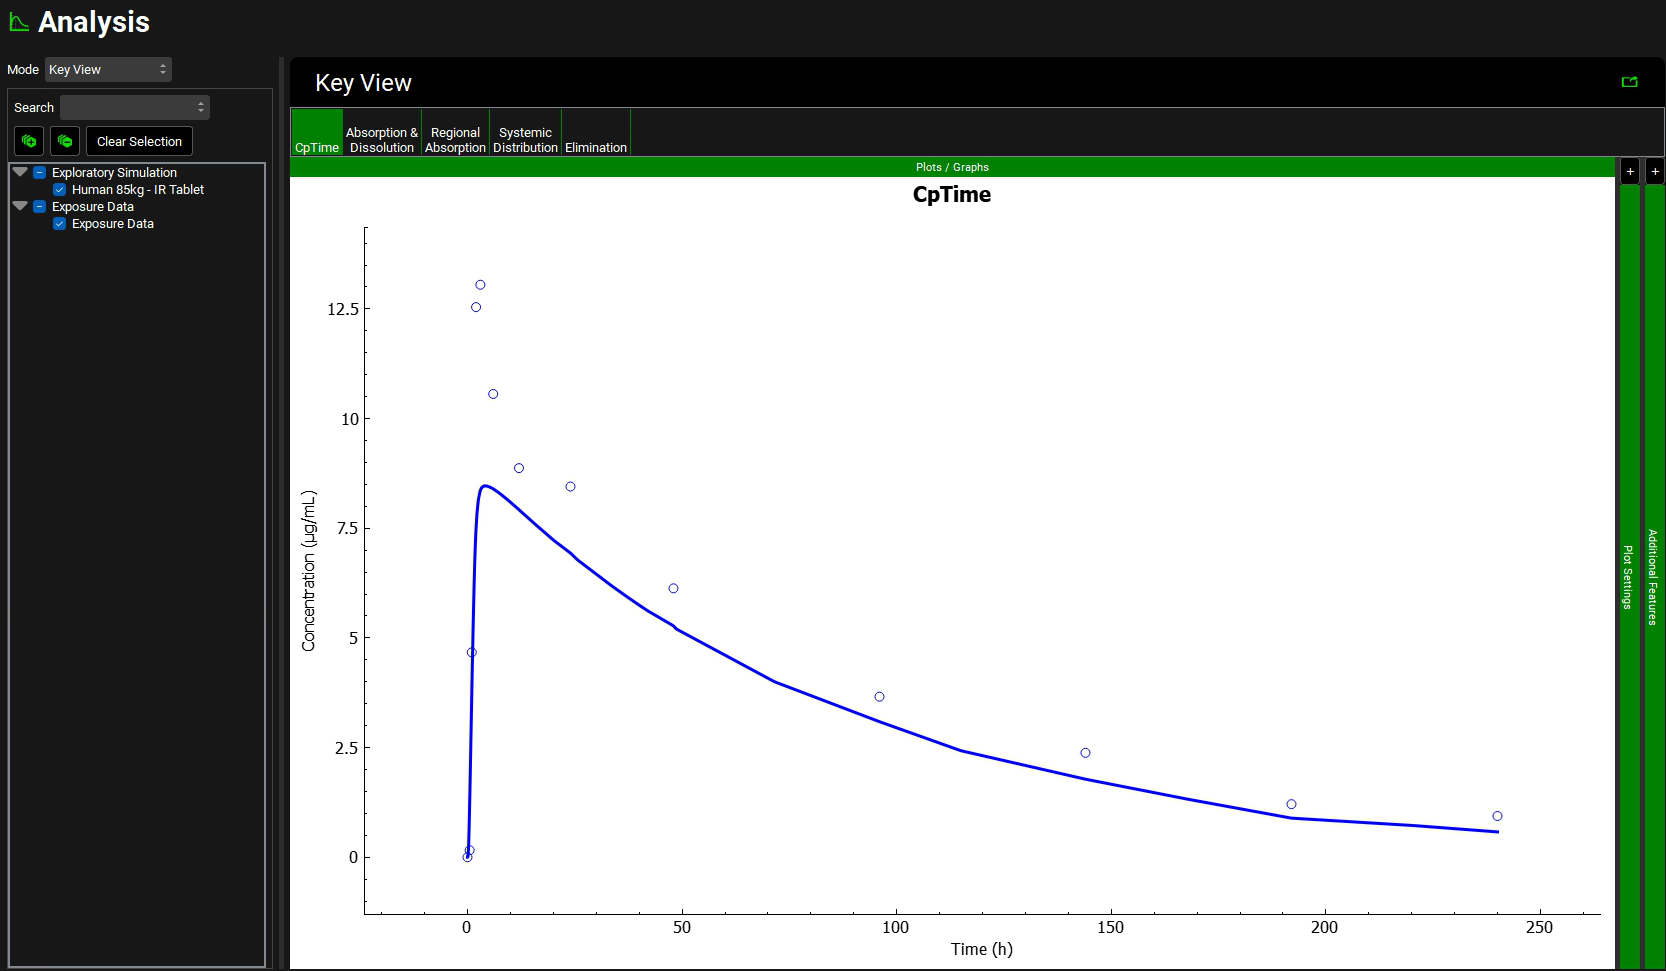
After the simulation is run, the view is switched automatically to the Analysis view where the simulated Cp-Time is displayed.
Now we will run a simulation using the same compound and dosing schedule assets but against a Human 70kg physiology.
Go to the Physiologies view to create a new physiology.
Click Add next to the Physiology field. The Enter Physiology name dialog box will appear. Type a descriptive name for the physiology, such as “Human 30YO 70kg”, and ensure that human is selected as species, then click on OK.
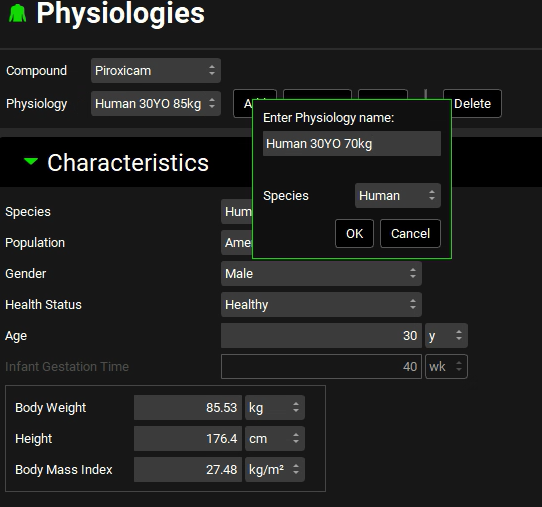
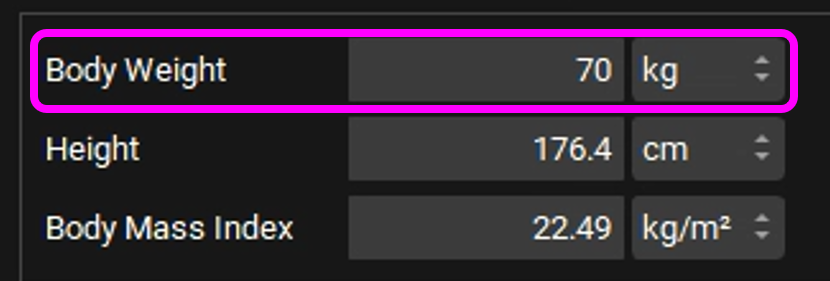
Change the Body Weight to 70kg. You have now added a Human30YO 70kg physiology.
If you are licensing PBPKPlus™ go to step 34. If you don’t have the license, go to step 41.
To create a PBPK model, open the Population Estimates for Age-Related Physiology (PEAR) panel.
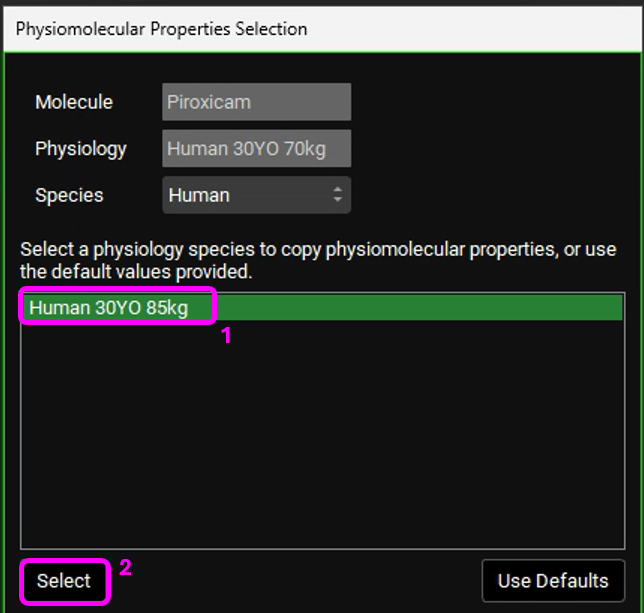
The Physiomolecular Properties Selection dialog box will appear. We will use the same physiomolecular properties (Rbp and Fup) as the Human 30YO 85kg physiology. Make sure the “Human 30YO 85kg” physiology is selected and click on Select.
In the Population Estimates for Age-Related Physiology (PEAR) panel, click on Create PEAR Physiology. The PEAR parameters table will be displayed indicating that a PBPK model has been created.
Open the Pharmacokinetics view. The PBPKPlus™ panel is enabled. Expand the panel to access the PBPK model.
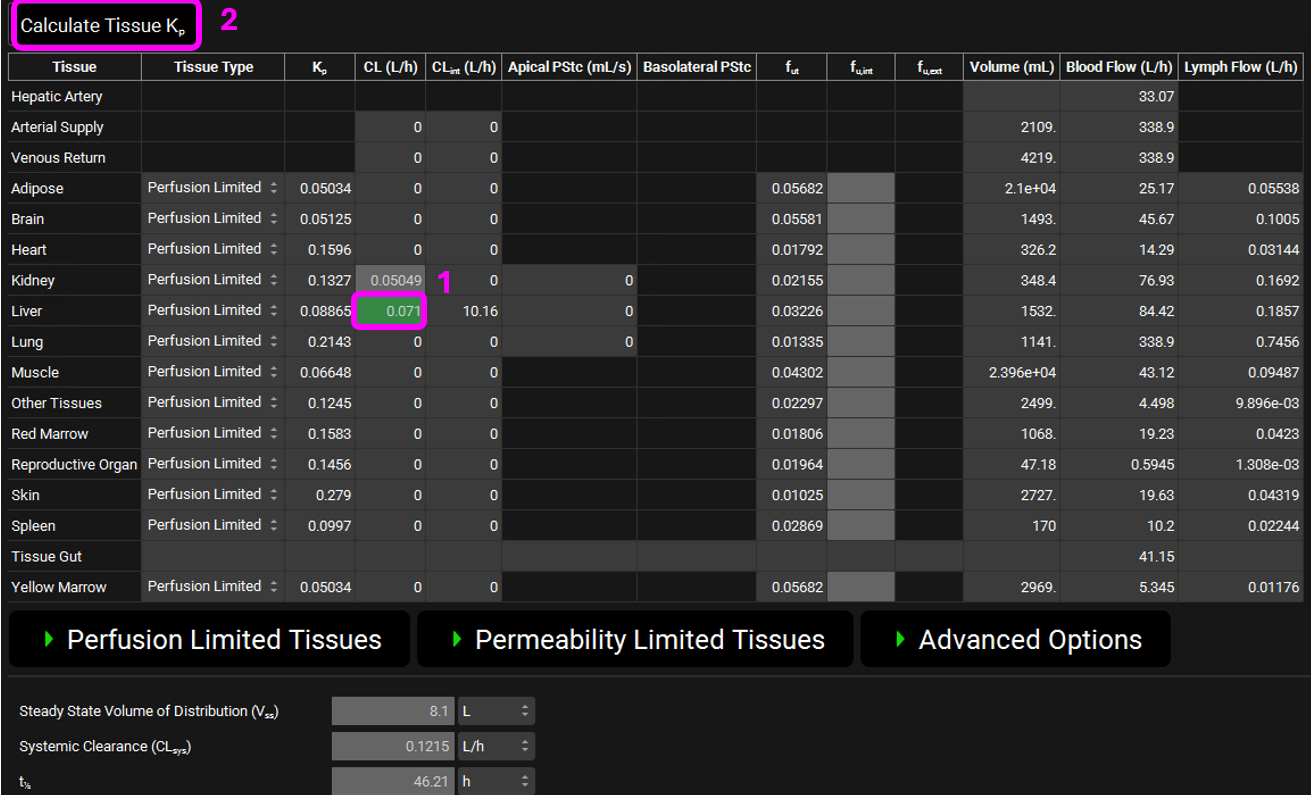
Scroll down to the PBPK table. Notice that a Kidney clearance is already present, representing the default Fup*GFR method.
Input the hepatic systemic clearance by clicking on the CL (L/h) column on the Liver row and type 0.071 L/h.
Click Calculate Tissue Kp at the top of the PBPK table to get the volume (Vss) for 70kg human. Skip to step 43.
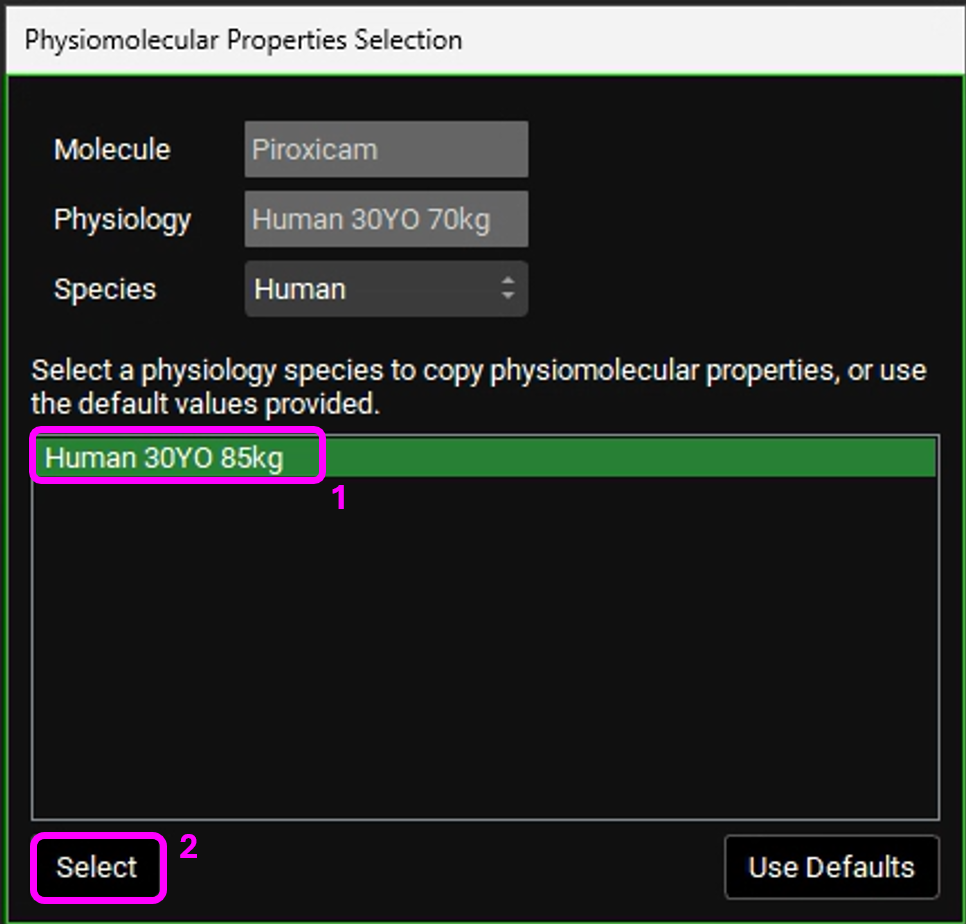
If you are not licensing PBPKPlusTM, after creating the Human 30YO 70kg physiology, open the Pharmacokinetics view. The Physiomolecular Properties Selection dialog box will appear. We will use the same physiomolecular properties (Rbp and Fup) as the Human 30YO 85kg physiology. Make sure the “Human 30YO 85kg” physiology is selected and click on Select.
The Compartmental PK model remains the same.
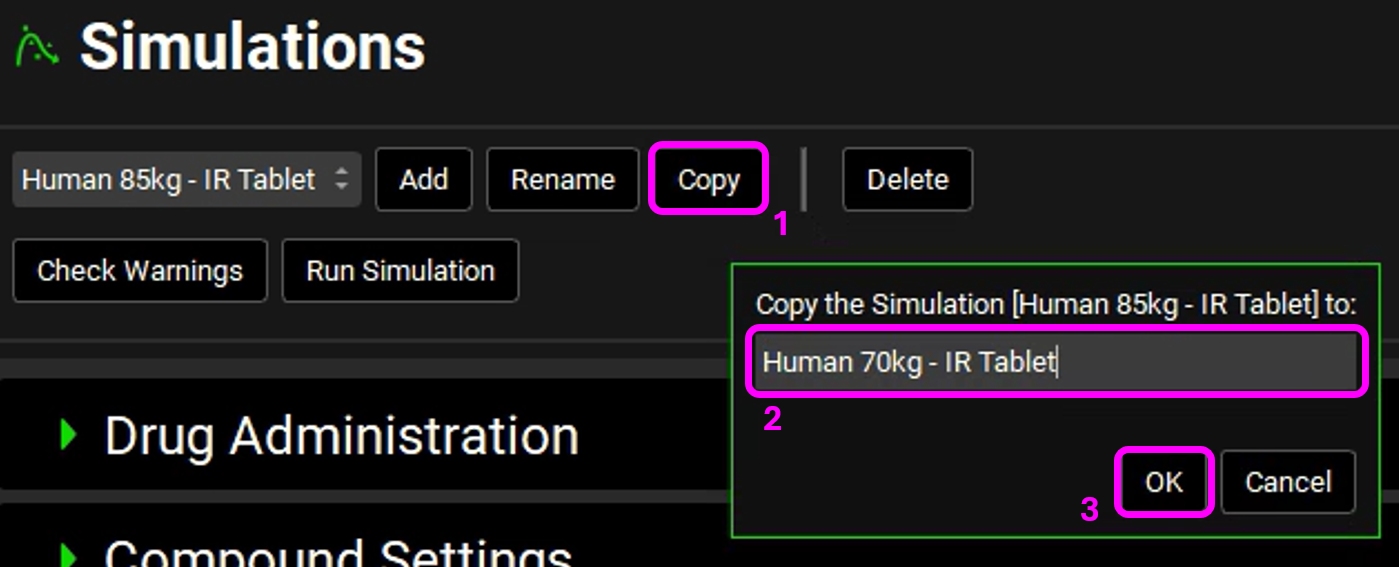
Go to Simulations view. Next to the simulation name, click Copy and rename the simulation to “Human 70kg-IR Tablet” and click on OK.
In the Drug Administration panel, select the Human 30YO 70kg schedule in the Physiology Schedule drop-down.
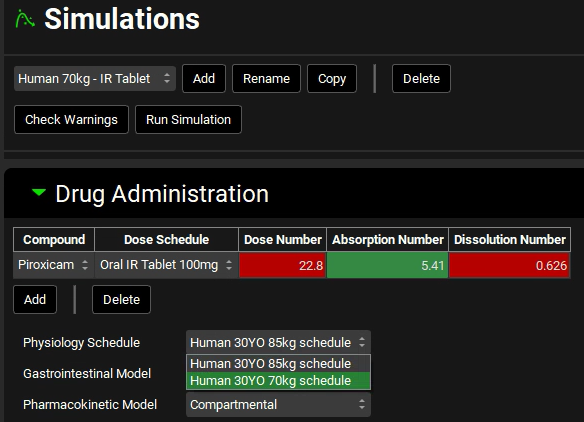
A message in the Messages center will appear warning you that the Physiology schedule has been changed. Click on Done to clear the message.
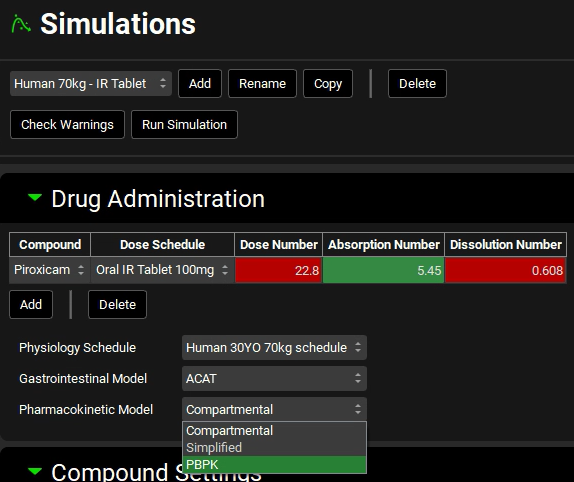
If you have created a PBPK model, select PBPK from the Pharmacokinetic Model drop-down. A message in the Messages center will appear warning you that the Pharmacokinetic model has been changed. Click on Done to clear the message.
Since we copied a simulation that had already linked the observed data, there is no need to do it again.
You are now ready to run the simulation. At the top of the Simulations view, click on Check Warnings. No warning messages should appear in the Messages center. Then, click on Run Simulation.
After the simulation is run, the view is switched automatically to the Analysis view where the simulated Cp-Time is displayed.
The plot below is generated from using a PBPK model.
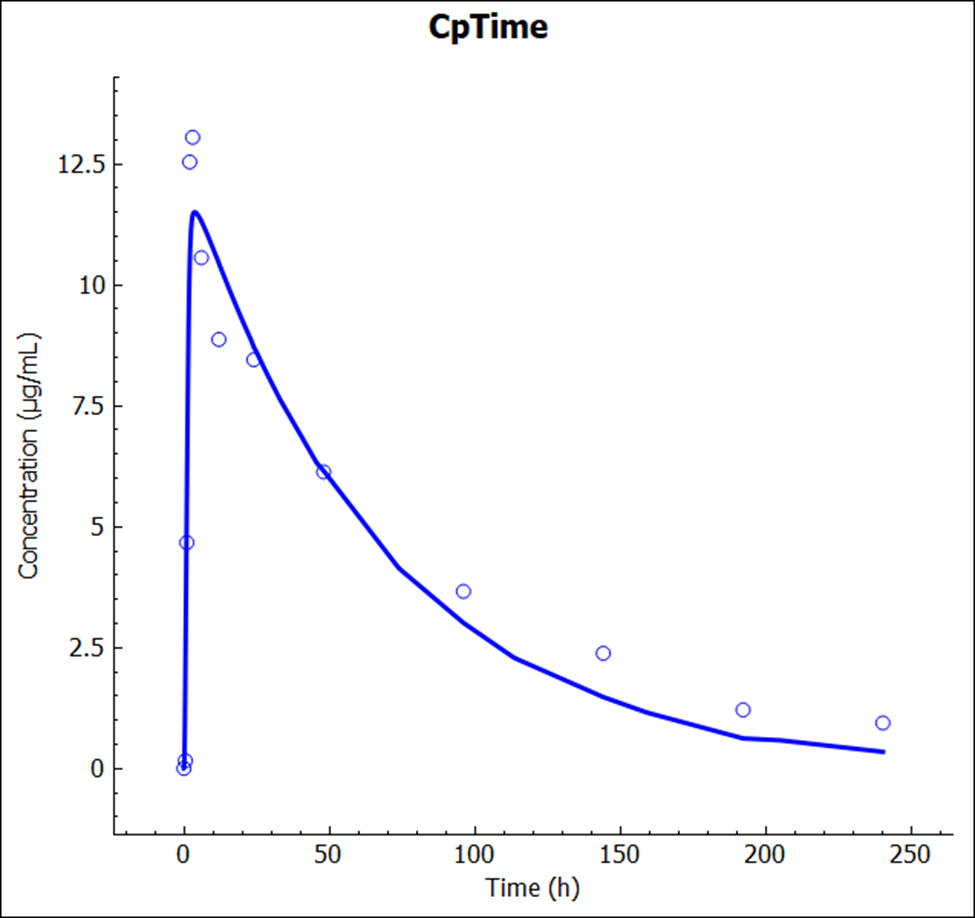
The plot below is generated from a compartmental model.
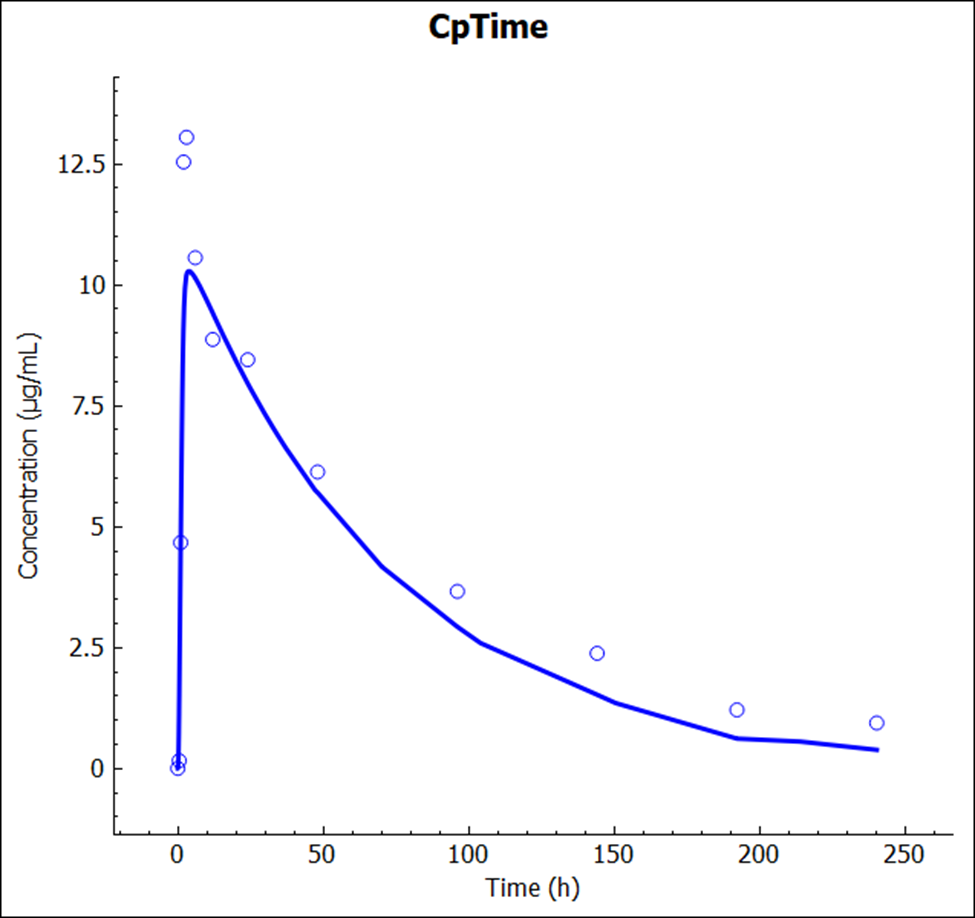
The result from the previous Simulation is also available and you can plot both to compare the impact of the changes in the simulation results.
Lab Book
The Lab Book view is where you can include notes on different parts of the project.
The Lab Book list on the left-hand side of the interface displays different sections (e.g.: Observed Data, Compound, Formulation…) and the assets will be displayed under its respective section. The notes should be included in the asset level.
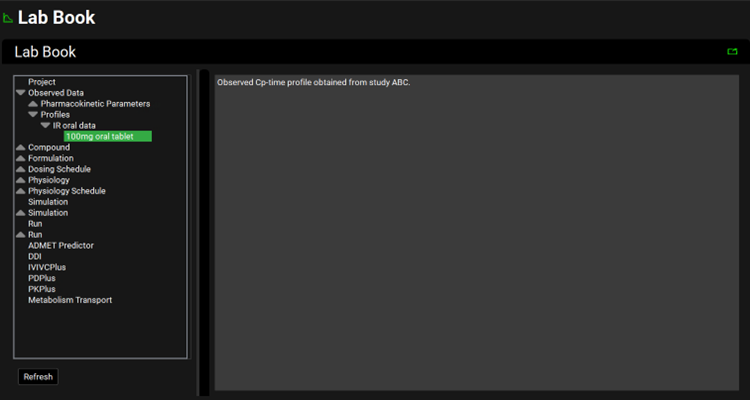
For example, in this tutorial we created an exposure data profile. When the Observed Data section is selected, you will not be able to enter notes. Selecting the “100mg oral tablet” asset will allow you to enter notes:
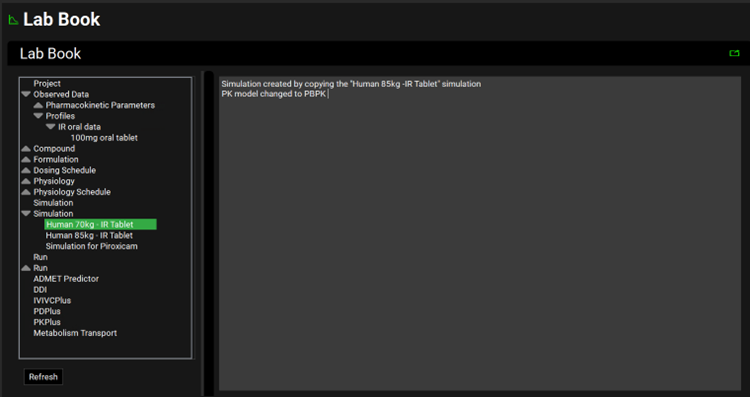
Here is another example:
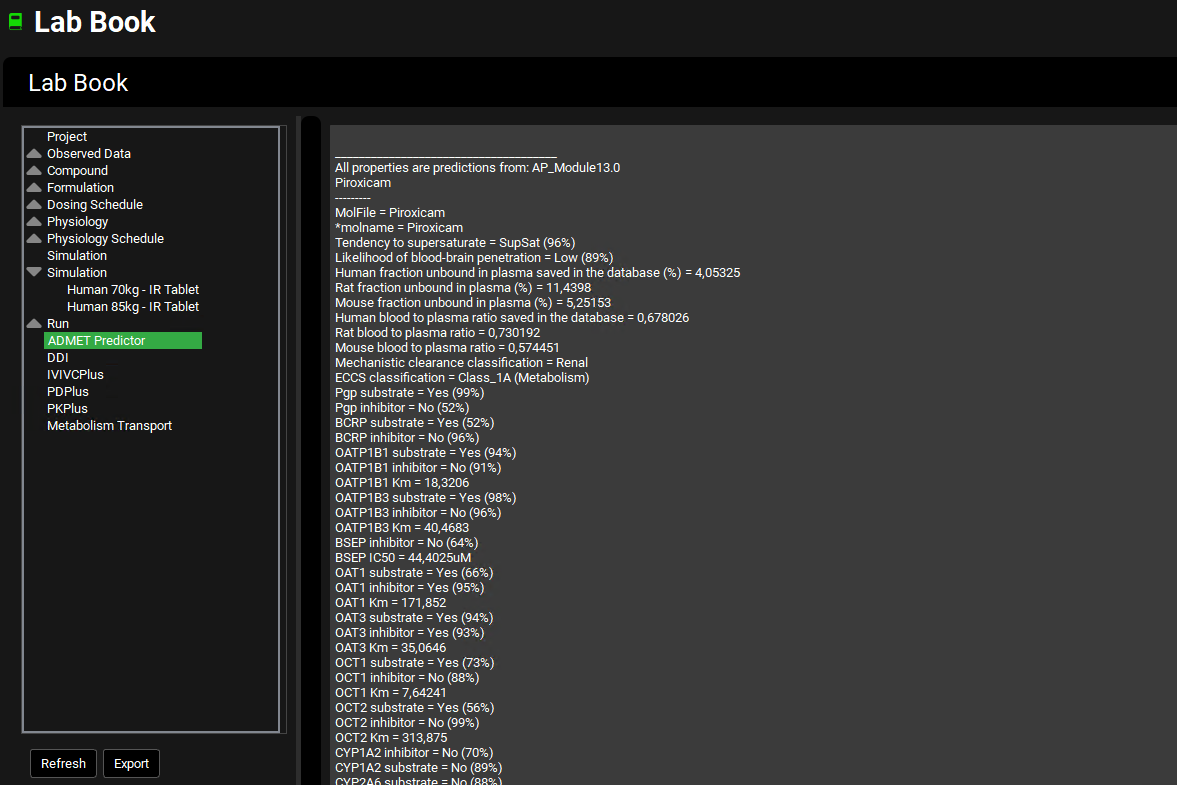
At the bottom of the list, the Modules are listed.
In this tutorial, if you imported the structure using ADMET Predictor®, the log information after import will be displayed in that section:
For a newly created asset to be shown in the Lab Book, make sure to click on Refresh at the bottom of the List.